Story & Bosses
Sixteen story trophies, including every boss. None are missable: they pop in order as you play. Below are the milestones in order with real tactics for Pyramid Head, the Flesh Lip, the Abstract Daddy, Eddie, the twin Pyramid Heads and the final boss.
Enjoy Your Stay
BronzeFull guideCollapse
Reach Silent Hill.
Enjoy Your Stay
BronzeFull guideCollapseHow to earn it
Story: pops during the cutscene on Wiltse Road where James reaches the town and picks up the South Vale map. Unmissable.
Tip
Before you walk down into town, turn back for No Turning Back Now: it's missable and it's your very first opportunity.
Nice and Cozy
BronzeFull guideCollapse
Reach Wood Side Apartments.
Nice and Cozy
BronzeFull guideCollapseHow to earn it
Story: leave the east side of South Vale and enter Wood Side Apartments. Pops as you arrive.
Tip
Wood Side has the handgun (Apartment 217, in the red shopping cart), and the balloons for Let's NOT Party! are in Apartment 207.
Otherworldly
BronzeFull guideCollapse
Enter the Otherworld for the first time.
Otherworldly
BronzeFull guideCollapseHow to earn it
Story: pops when you go through the red door in Apartment 201 at Wood Side Apartments.
Tip
Grabbing the handkerchief in Apartment 201 locks you out of the rest of Wood Side, so finish the balloons, both photos, the glimpse and the memos first.
Passed
BronzeFull guideCollapse
Make your way out of Blue Creek Apartments.
Passed
BronzeFull guideCollapseHow to earn it
Story: survive the first Pyramid Head encounter in Blue Creek Apartments. It's a 3-minute survival fight and he can't be killed: keep your distance, dodge his swings, and chip at him with the handgun if you like. After one minute he speeds up and wrecks the barricades. The trophy pops when you leave the building.
Tip
The clock-puzzle rooms before this hold 2 photos and 2 glimpses. Entering the ‘S’ door room on 1F is the point of no return.
Uncanny
BronzeFull guideCollapse
Meet Maria.
Uncanny
BronzeFull guideCollapseHow to earn it
Story: pops after the cutscene at the Rosewater Park docks where James meets Maria.
Tip
Rosewater Park's first nook on the right hides Strange Photo #7 on a stone bench, so grab it before you move on.
Admitted
BronzeFull guideCollapse
Reach Brookhaven Hospital.
Admitted
BronzeFull guideCollapseHow to earn it
Story: head out of the west side of South Vale and walk into Brookhaven Hospital.
Tip
Three Strange Photos on the way (Heaven's Night, Moonlight Grove, Reverie Theater) are highly missable. Collect each before moving to the next building.
Nightmare Fuel
BronzeFull guideCollapse
Defeat the Flesh Lip.
Nightmare Fuel
BronzeFull guideCollapseHow to earn it
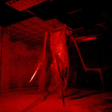
Boss (Brookhaven Hospital, after the Laura scene). Phase 1: it hangs from the ceiling and drops through the tiles. Its cage blocks bullets, so shoot the arm it hangs from or its exposed sides, and pipe it when it drops. Phase 2: it stays on the ground and rushes you with its mechanical arms. Dodge a lot and shoot it with the shotgun (around 10–12 blasts on Standard); its back is armoured.
Tip
The shotgun is in the Women's Locker Room (first locker you open) earlier in the hospital.
Alone Again
BronzeFull guideCollapse
Survive the chase in Brookhaven Hospital.
Alone Again
BronzeFull guideCollapseHow to earn it
Story: survive the Pyramid Head chase in the hospital's Otherworld section. Keep running, follow the only open route, and don't stop to fight.
Tip
The Otherworld hospital has 9 memos, 2 photos and a glimpse. Memo #46 on a stairway landing is highly missable.
Into the Abyss
BronzeFull guideCollapse
Reach the end of the long staircase.
Into the Abyss
BronzeFull guideCollapseHow to earn it
Story: in the Silent Hill Historical Society, keep walking down the enormously long staircase at the back. The trophy pops at the bottom.
Tip
Strange Photo #17 sits behind the glass of a cabinet in the second room on the left. It's gone once you start down the stairs.
Unforgivable
BronzeFull guideCollapse
Defeat the Abstract Daddy.
Unforgivable
BronzeFull guideCollapseHow to earn it
Boss (Labyrinth). Phase 1: it lunges to grab you and uses stunning sound waves; the rifle from range works best. Between phases: find and smash three TVs around the maze, avoid it and pick up ammo on the way. Phase 2: it's slow, so dodge the lunges and unload the shotgun up close.
Tip
Don't waste bullets on it while you're hunting the TVs. Breaking them is what moves the fight on.
Inner Sanctum
BronzeFull guideCollapse
Find His room.
Inner Sanctum
BronzeFull guideCollapseHow to earn it
Story: pops when you walk into Pyramid Head's octagonal room in the Labyrinth.
Tip
The Labyrinth has only 2 photos and 1 glimpse, but Photo #21 (rotating cube, third visit) disappears once you enter the Ruined Area.
A Human Being
BronzeFull guideCollapse
Kill Eddie.
A Human Being
BronzeFull guideCollapseHow to earn it
Boss (end of the Labyrinth, meat-locker arena). Phase 1: he darts between the hanging carcasses. Listen for his footsteps (headphones help) and shoot with the rifle or handgun. Phase 2: he bursts pipes to fill the room with fog, so switch to the shotgun and punish him after his melee attacks. Phase 3: the conveyor starts and he slows down; finish him with the gun or the pipe.
Tip
Save before the arena. Eddie's gun hurts, so take corners rather than trading shots in the open.
Glimmer of Hope
BronzeFull guideCollapse
Reach the Lakeview Hotel.
Glimmer of Hope
BronzeFull guideCollapseHow to earn it
Story: row across Toluca Lake and walk up through the garden to the Lakeview Hotel.
Tip
Before rowing to the hotel, sit on the lake for Scourge of Toluca Lake, and grab Strange Photo #22 behind some steps before you board the boat.
Truly Special
BronzeFull guideCollapse
Reach Room 312.
Truly Special
BronzeFull guideCollapseHow to earn it
Story: pops when you enter Room 312 in the Lakeview Hotel.
Tip
In New Game+, Room 312 is where the Bliss (drink the White Claudia before the tape) and UFO (fourth Blue Gem use) endings come together, so save before you go in.
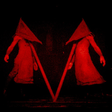
Obsolete
BronzeFull guideCollapse
Destroy what you don't need.
Obsolete
BronzeFull guideCollapseHow to earn it
Boss (Lakeview Hotel Otherworld): the two Pyramid Heads. They share one health bar, so hit whichever is closer. They thrust and throw their spears; keep your distance and use the rifle (about 22–24 shots) or play safe with the pipe (about 22 hits on Standard). There are supplies in the corners.
Tip
This comes right after the final nine-square save point. Make a manual save there, because every standard ending is replayed from it.
That Part of Me
BronzeFull guideCollapse
Defeat Her.
That Part of Me
BronzeFull guideCollapseHow to earn it
Final boss (Lakeview Hotel). Phase 1: she hovers, turns into moth swarms and grabs with tentacles; the rifle is ideal (about 10 hits). Phase 2: she drops from the ceiling (watch for sparks above); use the shotgun or handgun (6–8 blasts). Phase 3: fast leg strikes on the ground. Shoot from range or blast up close, and land the final blow after her third roar.
Tip
If she's lying in a bed when you arrive, you're on the Maria ending; standing at the window means Leave or In Water.
More Silent Hill 2 guides
Step-by-Step Walkthrough
Both playthroughs, area by area.
All Endings
All 8 endings: Leave, Maria and In Water, the NG+ item hunts for Rebirth, Dog and UFO, plus Bliss and Stillness.
Memos, Photos & Glimpses
68 memos, 26 Strange Photos and 26 Glimpses of the Past, area by area.
Missable Secrets
The seven one-off secrets: balloons, Room 106, the pizza, the lake, bread, the chainsaw and the very first trophy.
Combat & Kill Counts
Stomps, gun and melee kills, locked doors, windows and James of All Trades.
Challenge Runs
New Game+, no radio, under 10 hours and no gun kills.