Silent Hill 2 — Step-by-Step Platinum Walkthrough
Both playthroughs in order, area by area: the puzzle codes, every memo, photo and glimpse at the moment you pass it, every boss, the missable trophies at the exact moment they appear, three endings from one save, then the New Game+ route for the special endings. Tick trophies off as you go; progress saves automatically.
Your Platinum Checklist
Before you start — settings, runs & saves
Five minutes here saves you a third playthrough.
Silent Hill 2 has no difficulty trophies: combat and puzzle difficulty are separate, and Light on both is fine for everything. The platinum takes two playthroughs. Endings are saved to your profile, not your save file, so one late save can give you several of them.
| Run | Goal | Key trophies |
|---|---|---|
| Run 1 | Every memo, photo and glimpse; all the missable one-offs; guns for most kills; radio off. | Archivist, Pieces Unarranged, Echoes, Radio Silence, James of All Trades |
| End of Run 1 | Play for Maria, save at the last nine-square save point, reload for Leave and In Water. | Vicious Circle, Making Peace, Only Way Out |
| Run 2 (NG+) | Chainsaw, no gun kills, under 10 hours, plus the items for Rebirth, Dog and UFO. | Lumberjack, As Close as You Like, Faster Than Fog, I Saw That Town, the 3 NG+ endings |
Run 1 · South Vale East
The opening and the first stretch of town. Radio off, plank kill, and 25 collectibles.
The Observation Deck & Wiltse Road
- After the opening cutscene, turn around and follow the road to the left to its end. James turns himself back and No Turning Back Now pops.
- Walk the trail down through the fog and past the graveyard (in NG+ this is where the chainsaw and the first Rebirth item are, see Part 11).
- The cutscene on Wiltse Road gives you the South Vale map and Enjoy Your Stay.
 Trophy · Bronze · Missable
 Trophy · Bronze
South Vale (East)
- Your first enemy gives you the Wooden Plank and the radio. Switch the radio off now (Radio Silence), and kill at least one enemy with the plank before the Steel Pipe replaces it later (James of All Trades).
- Explore properly: try every locked door (You Never Know… needs 50) and smash shop and car windows for supplies (Shattered needs 50). This area alone has more than enough of both.
- Follow the blood trails on Saul St. to the Motor Home, then Saul Street Apartments (the vent near Apartment 7 leads to the Tenant's Note).
- Sanders St.'s parking bay has a corpse with a code note; use it to progress to Neely's Bar.
- In Neely's Bar, grab the note on the counter and the Back Room Letter from the locked back room before climbing through the upper hatch. After that the storm comes in and the shops lock.
 Trophy · Bronze
 Trophy · Bronze
Run 1 · Wood Side Apartments
Handgun, the balloon trophy and the coin puzzle. Nothing here comes back once you take the handkerchief.
Wood Side Apartments
- Take the map at reception and the Administration Note from the locker under the stairs.
- Apartment 202: the flashlight (from the mannequin) and the Chute Courtyard Key in the drawer behind it.
- The 2F Hallway Key gets knocked back to reception during the courtyard scene. Apartment 108's gold-handled wardrobe drops the Golden Apple Handle.
- Apartment 217: the Handgun in the red shopping cart. Apartment 213: the 212 Key by the TV and Glimpse #6 (scratched bedroom wall). Apartment 210: Photo #4 on the last window sill.
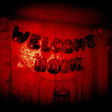
- Apartment 207 — the balloons. Shoot all 11 balloons (“Welcome Home”) with the handgun only; one popped with the plank won't count. Save at reception first.
- Apartment 206's safe (opened with the Golden Apple Handle; the code depends on difficulty) holds the Coin [Man] and the Steel Key. Apartment 205 has the 2F Small Staircase Key.
- 3F: the Strange Note in a drawer before Apartment 310 and the Sinister Note on Apartment 312's wall. Take the vent to the laundry for the Canned Juice and drop it down the chute for the Coin [Woman]. The Coin [Snake] is in the baby stroller in the courtyard pool.
- Solve the coin puzzle at reception for the Apartment 201 Key. Only pick up the Handkerchief in 201 when everything else is done, because it locks Wood Side.
 Trophy · Bronze
 Trophy · Bronze · Missable
 Trophy · Bronze
Run 1 · Blue Creek Apartments
The clock-hand puzzle, Angela's Knife, and the first Pyramid Head encounter.
Blue Creek Apartments
- From Apartment 307, cross the balcony to 305 for the 306 Key; 304 has the Valve. Use it to drop the hanging radio in 307: that's the Hour Hand.
- Put the Hour Hand on the grandfather clock in Apartment 212 and set it to 9. The kitchen wall in 210 opens; search the toilet three times for the Minute Hand.
- Figurines for the seesaw in 210: the Pigeon (cabinet shelf in the corrupted 210), the Wooden Swan Head (the corner of 211's back room, look for its shadow) and the Malformed Figurine Part (smash the glass on 209's bathtub). Combine them into the Swan, then put the Swan in the second notch to balance it and take the Winged Key.
- The Apartment 109 cutscene gives you Angela's Knife. Inspecting it steers you toward In Water, so only look at it if that's the ending you're going for. The Key of Resilience is on the table there.
- Set the clock to 9:10 and solve the moth puzzle (582 on Light, 373 on Standard), then search the hole in 202's wall three times for the Second Hand.
- Set 9:10:15 and go through the S door on 1F. Glimpse #8 (the corpse in the 1F stairwell) is available at this point.
- Pyramid Head is a 3-minute survival. You don't need to kill him: keep your distance, dodge, and after the first minute he breaks the barricades, so keep moving.
 Trophy · Bronze
Run 1 · South Vale West
Maria, the pizza, Jack's Inn and three photos that are very easy to miss.
South Vale (West)
- At Rosewater Park you meet Maria (Uncanny). Photo #7 is on the stone bench in the first nook on the right.
- Maria ending: from here on, talk to her at every optional prompt (the Historical Society door later, the dress in Jack's Inn's upstairs room, the Baldwin Mansion) and don't let her get hurt.
- Go west to Pete's Bowl-O-Rama: the pizza on the back-left bench gives Leftovers and Glimpse #9. Glimpse #10 is the barred gate at the bottom of the stairs south of it.
- Octantis Fuels: take the Garage Jack Lever from the green car, then raise the car in the garage behind Rosewater Park for Photo #8.
- Jack's Inn: the reception safe code is 0451 (Gate Key). For the Toolbox Memo, break Room 108's window and smash through into 107. Room 106's wall isn't damaged yet; come back after the hospital.
- You swap the Plank for the Steel Pipe around here, so make sure you've killed something with the plank first.
- Heaven's Night (dressing-room mirror, Photo #9) → Moonlight Grove (fountain on the southern path, Photo #10) → Reverie Theater (between the right-hand rows, Photo #11). Each one locks behind you.
 Trophy · Bronze
 Trophy · Bronze · Missable
Run 1 · Brookhaven Hospital
The shotgun, the bracelet puzzle, the Flesh Lip, and the Otherworld chase.
Brookhaven Hospital
- Reception: the Basement Key is in the office cabinet (287 on Light, 724 on Standard). In the basement, fill the Empty Fuel Can at the red hose and power the generator.
- Women's Locker Room: Shotgun in the first locker, and the Bent Needle from the teddy bear.
- Get the three bracelets: the Marked Bracelet (red book in Medical Records), the Bloodstained Bracelet (drain the pool with the Maintenance Key, which you get by using the medical tube on the pharmacy drain, then smash the crying-eye wall) and the Filthy Bracelet (Room D1 bed; the X-ray viewer code is 4 Right, 37 Left, 12 Right). The Nurses' Station code is 3578.
- Maria ending: check on Maria after the first bracelet, and again after the Rooftop Key.
- Put the bracelets on the mannequin hand in the Director's Office (92-45-71) for the storage-room key, then solve the bookshelf safe for the Rooftop Key.
- On the roof: Glimpse #14 on the catwalk and Memo #37 on the floor as you come back in. Both are highly missable.
- Flesh Lip: shoot the arm it hangs from, pipe the cage when it drops, then shotgun it once it's on the ground (about 10–12 blasts on Standard).
 Trophy · Bronze
 Trophy · Bronze
Brookhaven Hospital (Otherworld)
- Sweep the rust-covered hospital for 9 memos, 2 photos and Glimpse #16 (the handprints in M5).
- Grab Memo #46 on the stairway landing before you move on. It's highly missable.
- Survive the Pyramid Head chase: keep running along the only open route.
 Trophy · Bronze
Run 1 · Back to South Vale
The Otherworld town, the payphone, and the Room 106 secret you can only get now.
South Vale (Otherworld) & West revisited
- In the Otherworld town: the Note on a Map in the caravan with the save point, Glimpse #17 (your old map on Neely's Bar), and answer the ringing payphone by Martin St. for the Letter and the Wrench.
- Photo #16: break the driver's window of the car outside the Lucky Jade Restaurant at the end of Katz St. The tunnel you open with the Wrench is one-way.
- Back in the normal world: go to Jack's Inn Room 106 and inspect the damaged wall behind the bed.
- Take the Historical Society Key from the statue in Rosewater Park.
 Trophy · Bronze · Missable
Run 1 · Historical Society & Toluca Prison
The endless staircase, the rifle, and the prison's 15 collectibles.
Silent Hill Historical Society
- Photo #17 is behind cabinet glass in the second room on the left, by the locked door. Get it before the stairs.
- Maria ending: she'll talk to you at the entrance; take the chance.
- Walk all the way down the long staircase for Into the Abyss.
- Below: drop into the well and break the wall, then take the second right-hand door for the Spiral-writing Key. The bug room code uses the digits 2, 3 and 9 (the ones without blood), so there are six combinations to try.
 Trophy · Bronze
Toluca Prison
- Take the Rifle from the Armory and kill something with it (James of All Trades), then clear the cell blocks: Death Row, Blocks A–D, the showers, the canteen, the visitation room and the basement.
- Cell E13's photo is reached through the broken wall in Cell E1; Cell C4 needs the Shiv Key.
- Taking the execution lever locks the prison, so make sure all 9 memos, 2 photos and 4 glimpses are done first.
 Trophy · Silver · Missable
Run 1 · The Labyrinth
Two big bosses, and one of the most-missed photos.
The Labyrinth
- Maria ending: check on her whenever you pass her cell.
- Octagonal bug room: climb the left ladder; Photo #20 is in the next room. Glimpse #22 (the noose) is in the Rotten Area: take the west path from the Suspended Cage room and break the right-hand wall.
- Abstract Daddy: rifle it from range, smash the three TVs around the maze, then shotgun it once it's slowed down.
- At the rotating cube's third visit, turn it to the scratched-out symbol and go down for Photo #21. It's gone once you enter the Ruined Area.
- Walk into His room (the octagon) for Inner Sanctum.
- Eddie: listen for his footsteps between the carcasses, rifle or handgun him, switch to the shotgun in the fog phase, and finish him once the conveyor slows him down.
 Trophy · Bronze
 Trophy · Bronze
 Trophy · Bronze
Run 1 · Toluca Lake & the Lakeview Hotel
The lake trophy, the bread, the bookshelf, and the apple that matters for the endings.
Toluca Lake
- Before you board: go round the building to the right for Photo #22 behind some steps.
- Get in the boat and don't row for 10 minutes to get Scourge of Toluca Lake. Then row toward the light and walk up through the garden.
 Trophy · Bronze · Missable
 Trophy · Bronze
Lakeview Hotel
- Collect as you go: the Utility Room memo, Laura's Letter (after the restaurant scene), the reception counter memo, the Lost & Found Note through the broken wall in Cafe Toluca (NG only) and the garden-fountain glimpse.
- Reading Room bookshelf (to match the painting), top left to bottom right: Revelations: A New Understanding → The One Who Soared → Stalwart to the End → Pride Before the Fall (Light/Standard). Hidden Room 205 has memos #62–64.
- The mirror puzzle takes an apple: Ripe Apple for the Maria ending, Rotten Apple for In Water.
- Employee Section: the pantry glimpse, then the bread in the Kitchen (through the Freezer Room vent). The Venus Tears bar shelf has Photo #24.
- Walk into Room 312 for Truly Special. Using the Pump Valve in the Venus Tears kitchen is the hotel's point of no return.
 Trophy · Bronze · Missable
 Trophy · Bronze
Run 1 · The finale & three endings
One save, three endings, and the collectible trophies wrapping up.
Lakeview Hotel (Otherworld) & the finale
- Grab Photo #25 (Room 302 bathroom, move the trolley), Glimpse #26 (Reading Room couch), the Burned Note (Manager's Office) and Photo #26 (the catwalk, up the stairs and round to the right).
- Make a manual save at the nine-square save point and keep it. Every standard ending is replayed from here.
- Twin Pyramid Heads: they share one health bar, so rifle whichever is closer and dodge the spear thrusts and throws.
- The long hallway conversation: let it play in full for Leave and In Water, walk through without listening for Maria.
- Pick an egg door: Scarlet Egg for Maria, Rust-Coloured Egg for Leave and In Water.
- Final boss: rifle during the hovering phases, shotgun once she's on the ground, and finish her after her third roar.
| If you… | What happens |
|---|---|
| Play for Maria first | The final boss is lying in a bed if it worked. That's Vicious Circle. |
| Reload: inspect Mary's Photo & Letter, heal up | Leave: Making Peace. |
| Reload: look at Angela's Knife, drop to low health | In Water: Only Way Out. If Leave plays instead, lower your health further and try again. |
 Trophy · Bronze
 Trophy · Bronze
 Trophy · Silver · Missable
 Trophy · Silver · Missable
 Trophy · Silver · Missable
 Trophy · Silver · Missable
 Trophy · Silver · Missable
 Trophy · Gold · Missable
 Trophy · Silver · Missable
 Trophy · Bronze
Run 2 · New Game+ — the special endings
Chainsaw, no guns, under 10 hours, and every NG+ ending item on one route.
Start a New Game+. This is the no-guns run, so only use the chainsaw and pipe on enemies, and keep it under 10 hours by skipping cutscenes and going straight for objectives. Pick up the NG+ items as you pass them:
NG+ item route (in the order you pass them)
- Graveyard (right after the start): Book of Crimson Ceremony, by the lone grave under the tree on the shore. Rebirth item 1/4.
- Silent Hill Ranch: the chainsaw in the log pile opposite the ranch sign (Lumberjack).
- Wiltse Rd. green car: chainsaw the window for the Key of Sorrow (only there once you've seen In Water; for Stillness).
- Neely St.: Broken Key Part 1 in The Pet Center back room, and the Blue Gem from the Jewelers' left window next door.
- Katz St.: Broken Key Part 2 in the dog house through the gate. Combine the parts into the Dog Key.
- Saul Street Apartments roof: use the Blue Gem on the eye graffiti on the vent (UFO 1/4).
- Pete's Bowl-O-Rama safe, code 1887: the Cryptic Letter (the NG+ version of memo #61) and the Rusted Key (Bliss).
- Rosewater Park pier: Blue Gem (UFO 2/4). Baldwin Mansion entrance table: White Chrism (Rebirth 2/4).
- Brookhaven gazebo: open the small chest with the Rusted Key for the White Claudia (Bliss).
- Historical Society main room, the wall crevice on the right: Obsidian Goblet (Rebirth 3/4).
- Just after crossing Toluca Lake: Blue Gem (UFO 3/4).
- Lakeview Hotel: save first, then take the Book of Lost Memories from the Lost & Found (Rebirth 4/4). The Manager's Office safe (Key of Sorrow + code 314) has the Toluca Postcard (Stillness).
- Save before Room 312. From that save: use the Blue Gem in 312 (UFO 4/4, Tinfoil Hat); reload, drink the White Claudia in 312 before the tape (Bliss); reload, open the Observation Room with the Dog Key (The Goodest Boi).
| If you… | What happens |
|---|---|
| Finish the run carrying all four ritual items | Rebirth: Defy Even Death. With Leave, Maria, In Water and Dog, that completes Party Like It's 2001. |
| Examine the Toluca Postcard and finish | Stillness, the remake-only ending (no trophy). |
 Trophy · Bronze · Missable
 Trophy · Silver · Missable
 Trophy · Silver · Missable
 Trophy · Silver · Missable
 Trophy · Gold
 Trophy · Silver
 Trophy · Gold · Missable
 Trophy · Silver · Missable
 Trophy · Bronze
Cleanup & platinum
The one counter that can lag behind.
Whatever's left adds up over playthroughs. Check the trophy list:
Cleanup
- Merciless (50 stomp kills) has an unreliable counter. Stomp every downed enemy on both runs. If you're short, the Blue Creek bug farm (grab the ammo in the crib to spawn a bug, stomp it, reload) finishes it quickly.
- If Party Like It's 2001 is stuck at 4/5, replay whichever classic ending didn't register from your late save.
- You Made Me Happy pops once everything is in.
 Trophy · Bronze