← All guides Just DroppedSoulslikeFirst-PersonAction RPGPS5
Valor Mortis
The Ghostrunner team's first-person soulslike, set in a plague-cursed version of the Napoleonic Wars. Our review, the platinum roadmap, a chapter-by-chapter walkthrough and all 39 trophies explained in depth, from General Lothaire to the Entity.
The Review
Parry, shoot, burn: a soulslike with its own voice
You are William, a British soldier serving in Napoleon's Grande Armée, killed in battle and raised again by the Emperor himself, voiced by Vincent Cassel. An alternate 19th-century Eastern Europe has been eaten by a supernatural plague, and your old comrades now serve as the Eternal Guard: undead soldiers, swollen abominations and officers fused with a red substance called Nephtoglobin. Valor Mortis is One More Level's follow-up to Ghostrunner, and it brings that studio's movement (wall jumps, grapples, ziplines) into a first-person soulslike with Lanterns for bonfires and Catalysts for souls.
The combat loop is what sells it. Your sabre parries almost everything, and a parry-heavy rhythm fills the enemy's stagger bar for brutal criticals. Your flintlocks (Pistol, Blunderbuss, Musket) pop glowing weak points, and the three Transmutations (Fire, Stasis and a Shield) add crowd control. Learning to chain all three, so you ignite, shoot the weak spot, parry and finish, is a great feeling, and bosses like the Slaughtermill windmill and the Orphan are memorable set pieces.
It isn't flawless. Several bosses come back as regular enemies, the middle regions lean on familiar soulslike ideas, and difficulty spikes are uneven. Critics landed in the high 70s to low 80s (around 83 on PS5 Metacritic at launch, with most critics recommending it), and we agree: a confident, stylish soulslike at a fair $39.99. For trophy hunters it's a friendly 5/10 platinum with one missable, no difficulty trophies and free roam after the credits.
Platinum Roadmap
The road to Nephtis Superioris
One playthrough, 15–25 hours, no difficulty or online trophies. The only thing that can go wrong is spending the wrong upgrade material.
1Play the story and explore every side path. Follow our chapter walkthrough for Ambers, Oathbound Guardsmen and side quests as you reach them. Open every chest: upgrade materials can't be farmed. 2Save the first Quintessential Transmutation Material (Monster Hunt reward, Chapter 7) for the Shield (Chapter 8). Shield level 5 earns Transmutation Artifex and unlocks Shield Bash for the missable Abyssal Eviction.
3Farm the skill trophies at Fallen Village > Marketplace. The barn's five villagers respawn every rest: Scattershot, Hood-Snatcher and Flaming Feast. Use Broken Bridge for the mid-air shots.
4Max one weapon of each type. Only one Masterwork Firearm Part exists, so choose your favourite gun.
5Clean up after the credits. The Shield opens poison areas: Oathbound #6, Perfect Copy, The Emissary and The King of Smugglers. Then beat the Entity, if you haven't already.
Trophy Guides
In-depth guides
All 39 trophies explained in depth, with verified grades (1P/3G/14S/21B) and the real trophy art, plus a full chapter-by-chapter walkthrough.
🗺️
Chapter-by-Chapter Platinum Walkthrough
All 11 chapters in order: every Amber, Eternal Guardsman, side quest step and upgrade material, plus the one missable.
⚔️
Bosses & Story
All 10 bosses with tactics for every phase, General Lothaire to the Entity, plus the Shrike and every weapon unlock.
📜
Side Quests & the Oathbound
Every step of the Oathbound hunt (7 Eternal Guardsmen and the secret room) and the five trophy side quests, including all 17 Monster Hunt drawings.
💎
Ambers, Weapons & Upgrades
All 29 Ambers with every location, all 9 weapons and Transmutations, and every max-level upgrade material.
🔥
Combat & Miscellaneous
Scattershot, Hood-Snatcher, Flaming Feast, God's Trigger, the bonfire, the missable Shield Bash kill and every other skill trophy.
Every Trophy
All 39 trophies — explained in depth

Nephtis Superioris (Platinum)
Details
Earn the other 38 trophies. It's one playthrough of about 15–25 hours depending on how fast you learn the parry, fully offline, with no difficulty settings: everyone plays the same game. Story, every side quest and every Amber fit in a single run, and you get free roam after the final boss, so anything you skip can be cleaned up later. Tip: The only thing to plan is the Shield Transmutation: keep the first Quintessential Transmutation Material (from the Monster Hunt quest) and spend it on Shield once you have it in Chapter 8. That one upgrade earns both Transmutation Artifex and the missable Abyssal Eviction.
Bosses & Story 11 trophies
Eleven of the trophies come from the main story: ten boss kills and meeting the Shrike. Every boss is mandatory, there are no optional ones, and none of these trophies can be missed. Some bosses later return as regular enemies, so learning them pays off twice. The trophies are listed in the order you earn them.
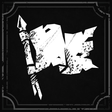
Torn Banner
Details
Silver — Kill General Lothaire, the Eagle-Bearer. Story.
General Lothaire, the Eagle-Bearer ends Chapter 1: Revival, but that first fight is scripted for you to lose. You beat him for real at the end of
Chapter 2: Regroup in the Valley of Ashes. He has
two full health bars. In phase one he swings a sword and spear in combos you can parry, except the attacks that flash
red (unblockable, so dodge them). After some combos he stops and fires the guns on his shoulders: wait for the gold flash to fade, then dodge. The damage plan: set him alight with
Fire, then shoot the glowing weak spots on his body with the
Pistol. Weak-spot hits fill his stagger bar fast, and parries or melee hits top it off for a big critical. In phase two he drops the sword for a huge arm, gains a few unblockable swings, including a
grab that hurts badly, and raises soldiers from the ground. They die in one hit, so clear them with a Pistol shot or a burst of Fire.
Tip: If you have a full Nephtoglobin bar straight after the critical, re-ignite him at once. The weak spots come back in phase two, so the same Fire-then-Pistol loop works all fight.
Full guide → 
Ultima Ratio Regum
Details
Silver — Defeat The Iron Marshall. Story.
The Iron Marshall waits at the end of
Chapter 3: Rendezvous in the Fallen Village Orchard. It's a slow brute that swings a metal pipe, and every swing can be parried unless it flashes red. The arena is ringed with
explosive barrels: shoot them when it walks past to set it on fire and stun it. Whenever it's stunned, or after you dodge round a slow swing, take out the
Blunderbuss (picked up earlier this chapter) and fire into the large
weak spot on its back. That does heavy health and stagger damage, and a few back shots plus Rapier jabs finish it quickly.
Tip: This enemy type returns later as a regular foe (the 'Remnant of the Iron Regiment'). The same back-shot trick works on those, and one of them is needed for Statue of Insanity.
Full guide → 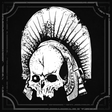
Not a Cat Person
Details
Silver — Defeat the Sphinx. Story. The
Sphinx ends
Chapter 4: Dark Descent in the Caverns. It has two health bars. Its claw swipes apply
Stasis if they hit you or you block them instead of parrying; a full Stasis meter cuts your stamina hard until it wears off, so parry or dodge.
Phase one: it alternates parryable claw combos with a line of purple ground spikes (dodge sideways, since they travel straight), leaps at you (dodge just before it lands, as this counts as unblockable), and raises its tail to form an orb that turns from red to purple and drops. Shoot the orb in the air, or jump the shockwave if it lands. Fire burns out quickly on this boss, so the best damage comes from
parrying claw swipes into staggers and landing melee hits between combos.
Phase two: its mask breaks, revealing a
face weak spot, and it starts fighting at range. Sidestep the purple beam it fires after jumping back and shoot its face while you close in. Back off
immediately when it raises its head and sprays bugs: they apply
Poison, and a full Poison meter kills instantly.
Tip: A point-blank
Blunderbuss shot to the face in phase two takes a big chunk. Keep the Pistol drawn between its ranged attacks and every gap becomes a face shot.
Full guide → 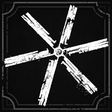
Quixotry
Details
Silver — Defeat the Slaughtermill. Story. The
Slaughtermill, a monstrous living windmill, ends
Chapter 5: Crime in the Vale of Wrath. It's a puzzle boss you beat by shooting weak spots.
Part 1 (field): destroy four weak spots: two on tentacles when they burst up, one under it during the stomp, and one behind the lower door. To reach the last one, grapple the door open to expose the gears, freeze them with
Stasis so the mill stops turning, then grapple the other door. Kill the Carrion it summons to restock ammo. When it shoves you back, run in through the ground waves, grapple up and round to the inside and shoot the cluster of eyes. Use the
Blunderbuss on the big central eye.
Part 2: back outside, shoot four more spots (the lower door, one on the mill itself, and two on the tentacles) while dodging the exploding corpses it throws, then raise
Nephtoglobin walls to block the fire it blows at you as you push to the front.
Part 3 (checkpoint): a platforming run to the left. Twice you must shoot exploding bodies on the platform below
before you land on it. Falling only costs health and sends you back to the start of the run. Finally, shoot every weak spot on the tentacles holding it to the ceiling, then empty your guns into the central eye.
Tip: There's a checkpoint before the platforming run, but if you die after it your dropped Catalysts appear on the path just past the
Old Windmill Lantern, not in the arena.
Full guide → 
My Dying Bride
Details
Silver — Defeat the Bride. Story.
Anna, the Bride Drowned in Tears opens
Chapter 6: Punishment in the Cursed Hollow. It's a crowd fight. She rises from the water with an
unblockable lunge: dodge it, then punish. Depending on how much damage you deal, she either follows up with parryable strikes or sinks and repeats the lunge. At about half health she vanishes and returns with a wave of
villagers. They're as weak as the ones elsewhere in the area, so kill them quickly before they flank you, then go back to her. She calls one more wave later. If she's low by then, ignore the villagers and finish her: they all die when she does.
Tip: Afterwards, the wreath on the altar at the end of the arena starts the
Till Death side quest (Tomorrow's Promise Amber).
Full guide → 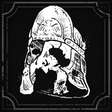
True Oath
Details
Silver — Defeat Justicar Aurelius. Story.
Justicar Aurelius opens
Chapter 7: Witch Hunt in the Outskirts. His two health bars are two versions of an
Eternal Guardsman. Phase one fights exactly like the Oathbound Guardsmen you can hunt from Chapter 2: sword combos that are best
parried into a full stagger. In phase two he takes the monster form, keeping the same sword combos and adding two arm attacks: a quick two-hit combo, signalled when he holds the arm out, and an
unblockable leap that hangs in the air far longer than you'd expect. Wait for it to land, then dodge.
Tip: If he's giving you trouble, go and practise on the Oathbound Guardsmen first. They use the same moveset, and killing them counts toward We Wear the Same Colours. Set him on fire between combos for extra damage.
Full guide → 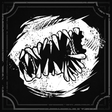
Lament of the Limbs
Details
Silver — Defeat Experiment 83. Story.
Experiment 83 waits at the end of the Outskirts (Lighthouse), midway through
Chapter 7: Witch Hunt. It returns later as a regular enemy, so it's fairly simple. It swipes straight at you and uses long
unblockable grabs: dodge to the side, then hit it from behind while it's still recovering. It has two weak spots for firearm stagger, but the one on its
back is hard to hit in these narrow corridors.
Tip: Don't leave yet: the side lab next to the arena has a chest with a
Quintessential Blade Material (one of the three max-level blade upgrades) and two notes.
Full guide → 
Birdwatcher
Details
Silver — Rendezvous with the Shrike. Story. Pops when you reach the
Shrike at the end of the City of Orphans sewers, once Chapter 7: Witch Hunt has wrapped up. It's a meeting, not a fight. She gives you the
Laboratory Key for the University.
Tip: Before heading to the University, finish the City of Orphans side content:
Monster Hunt (17 drawings) rewards the first Quintessential Transmutation Material, which you'll want for the Shield.
Full guide → 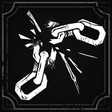
Coup de Grâce
Details
Silver — Defeat the Orphan. Story.
The Orphan ends
Chapter 8: Blasphemy in the University. It's a towering, restrained creature with a huge sword and two phases.
Phase one is almost entirely sword attacks, so it's
all parryable: a single slash, a four-hit spin (two alternating, then two fast from one side), a six-hit wide flurry (two slow, four fast) and a leaping strike. At times it retreats wounded and the room turns red. Then you can only block and parry the ranged attacks until it reappears.
Phase two is faster, and every flurry now ends in an
unblockable finisher. It also tears a
pipe from the wall for a huge-range sweep (run and dodge) and charges an
Acid Blast: the glowing ball in its gut is a weak spot, and shooting it interrupts the attack. Its biggest opening comes after the
unblockable leap in phase two: it sits down for a moment, and you get a long free combo.
Tip: Treat it as a parry fight first and a dodge fight second. Three-swipe combos that end in a jump or two-handed slam can be parried for the swipes, then dodged for the finisher.
Full guide → 
Behemoth
Details
Silver — Defeat Nephtis Superioris. Story. The boss named for the
Nephtis Superioris (in-game,
Captain Raphael of the Nephtis Superioris) ends
Chapter 9: In Ruins in the Fortress. He fights like a duellist: he switches between sword and
pistol,
blocks and parries your attacks, and can
drink a Ferrofluid flask to heal. Attack him while he's crushing the flask to cancel some of the healing. Your window is right after he finishes a combo: you get roughly
one to four hits before he starts blocking again. Key moves: two slashes into a running
unblockable leap-thrust (dodge it, then punish), a slash-and-spin combo, pistol volleys (keep your guard up after the first shot, as he fires several) and an
Energy Slam shockwave you jump over. Below 50% he chains several slams in a row, so hop each wave, and he starts dashing between combos.
Tip: The
Claymore staggers him on every landed hit, which keeps you on the offensive far longer than the Saber or Rapier. Ranged play doesn't work, because he always closes the gap.
Full guide → 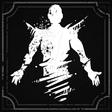
In His Own Image
Details
Gold — Defeat the Entity. Story, and the hardest trophy in the game. The final boss, the
Entity (Voice of the Void), is fought in Chapter 11: Reflection: interact with the
stone door by the Caverns > Ancient Lair Lantern.
Phase one: it fights with your own arsenal, morphing its blade between Saber, Rapier and
Claymore, and uses Fire. Every weapon swap is a vulnerable moment, especially when the blade becomes a Claymore and it stands still to wind up. Hit it hard there. When it floats up to summon
tentacle spikes, shoot it to damage it and break the attack. Its Fire burst locks it in place, so sidestep and punish. Two clones appear; each dies to
one hit.
Phase two: it rises and summons a large wave of one-hit clones, then rejoins the fight and starts calling liquid copies of
earlier bosses. Each copy also dies to one hit and always opens with that boss's leap attack, so be ready to dodge.
Tip: Bring plenty of ammo and the
Claymore: its area attacks wipe clone waves in one swing, and firearms deal with the rest. After the credits you're placed back near the final Lantern with free roam to finish anything left.
Full guide → Side Quests & the Oathbound 6 trophies
There are 20 side quests. Six of them have trophies, and most of the others reward an Amber you need for Ambersmith, so it's worth doing all of them. None of the trophy quests can be missed. Every quest can be started or finished after the credits, and dialogue choices change the outcome but never the reward. The only quest that can be missed, The Choir, happens in the Chapter 10 jail, gives only a consumable and has no trophy.
We Wear the Same Colours
Details
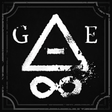
Gold — Complete the Oathbound quest. Complete
The Oathbound, a quest that spans the whole game. Seven optional
Eternal Guardsmen are hidden across seven regions. Each one drops a
Mysterious Stone Pyramid and a soldier's
Emblem. Once you have all seven Emblems you receive the
Mysterious Stone Slab, which opens a hidden wall in the Fortress. The sixth needs the
Shield (Chapter 8) to cross poison, and the seventh is the monster Guardsman in the Fortress Courtyard (Chapter 9). To finish, go to the far side of the Fortress Courtyard room where you fought the monster Guardsman, use the wall marked with the Oathbound symbol, and pick up the note on the table inside.
Tip: Look in the chest behind each Guardsman too: several hold Ambers (Duellist's Focus, Perfectionism x2, Life Diverted). The secret room's two chests hold an
Empty Ferrofluid Flask and a
Quintessential Blade Material.
Full guide → 
A Bitter Cure
Details
Bronze — Complete the Laudanum quest. Complete
Laudanum (Chapter 7, the Outskirts).
1. At
Island of Whispers, after the children speak to you again, walk down the street toward the shortcut weak spot and knock on the
brown door on the right.
2. Round the left side of the building, a second door lets you agree or refuse to help the children. This choice is
final. Agreeing gives you a Poison-Filled Bottle.
3. From
Market Square, go through the poisoned area to the house, drop through the hole in the upstairs floor and take the
Laudanum (poisoned if you agreed).
4. Hand it in at the brown door, rest at a Lantern, come back and go upstairs or downstairs depending on your choice to finish.
Tip: Either choice earns the trophy and the
Potent Concoction Amber. You can also get Potent Concoction elsewhere, so the choice is purely story.
Full guide → 
Blood and Wine
Details
Bronze — Complete the Curious Case of Seamus Diggory quest. Complete
The Curious Case of Seamus Diggory (Chapter 6, Cursed Hollow >
Silent Cannons).
1. Cross the river platforms. Where the cannon enemy stands, go right to a wall-run, then talk to Seamus through the house window and take the
Empty Bottle.
2. In the miniboss area, use the bottle on the
pig lying on the ground for the Blood-Filled Bottle.
3. In the shack with animals hanging from the ceiling, take the
Bottle of Wine from a barrel.
4. Back at the window, give Seamus either one. The reward is the same.
Tip: Rewards a
Ferrofluid Flask Power Upgrade. The dog miniboss behind the house with three notes drops
Warrior's Fury, and an exploding chest past Seamus's shack has
Indestructible Shell.
Full guide → 
Hand in the Jar
Details
Bronze — Complete the Deserter quest. Complete
The Deserter (Chapter 5, Vale of Wrath >
Under the Bridge).
1. Cross the bridge and pick up the
Wanted Notice in the shack.
2. After leaving the basement from the
In the Name of Art quest, turn right and use the two grapple points. Kill the
Eternal Guardsman there for the
Beekeeper's Hut Key, open the hut and read the
Deserter's Diary.
3. The
Beekeeper's Note outside warns that hives marked with
red Xs are dangerous. Search only the
square hives for the three
Anubis Figurine parts: the square hive furthest from the hut; the square hive on the right of the group by the body-covered road, before the wooden walls; and, in the town, through the first house on the right and out the back, the square hive to the left of a group of three.
Tip: Rewards a duplicate
Bountiful Harvest (upgrades it). The chest at the back of the hut has another
Perfectionism Amber.
Full guide → 
Aggressive Reconnaissance
Details
Bronze — Complete the Unheard Farewell quest. Complete
An Unheard Farewell (Chapter 2, Valley of Ashes).
1. At
Guidepost, in the open area after the first Grenadier, talk to the adjutant in the carriage window and agree to help.
2. Leaving the cave after the lift (
The Climb), this step updates by itself when you reach the top of the ladder.
3. After climbing the cliff, at the second spot where you shoot Nephtoglobin points to free the lift, ride it back down to the central platform. You have to jump off while it's moving. Burn the wall of gold vines opposite the way you came, kill the miniboss and take the note
Letter to all Commanding Officers of the Line Infantry.
4. Climb to the top, kick the ladder down near the first Lantern (
Demolished Path) and report to the adjutant. Any answer gives the same reward.
Tip: Rewards the
Sleight of Hand Amber (faster reloads and weapon swaps). An
Epic Catalyst Clot lies on the ground next to the carriage.
Full guide → 
The Book of Beasts
Details
Bronze — Complete the Monster Hunt quest. Complete
Monster Hunt (Chapter 7, City of Orphans): collect
17 drawings pinned around Tribunal Square, Shamble Street and the Sewers. The first,
Drawing of a Lancer, is on the tree right next to the
Tribunal Square Lantern. You'll pick up most of them on the main path if you check walls and pillars. The last three are in the Sewers, behind the
Sewers Key door.
Tip: This quest rewards the
first Quintessential Transmutation Material. Don't spend it until you have the
Shield (Chapter 8): Shield at level 5 earns Transmutation Artifex and enables the missable Abyssal Eviction.
Full guide → Ambers, Weapons & Upgrades 5 trophies
The gear trophies: collect every unique Amber, unlock all nine weapons and Transmutations, and take one Melee Weapon, one Firearm and one Transmutation to max level. The max-level materials are limited (one Masterwork Firearm Part, two Quintessential Transmutation Materials) and can't be farmed, and that's the one way to miss a trophy in this game.
Arsenal Absolute
Details
Silver — Unlock all Weapons and Transmutations. Story-related, so it can't be missed. There are nine in total: three of each type, and the game makes you pick up every one to progress.
Melee: Saber (Ch.1), Rapier (Ch.3, in a body on the road from the Abandoned Church), Claymore (Ch.6, in the Cursed Hollow church after you shoot its two side weak spots).
Firearms: Pistol (Ch.2, train car at the bridge), Blunderbuss (Ch.3, carriage behind a Volunteer in the Fallen Village), Musket (Ch.5, the Wagon Key from the dual-sword Volunteer in the Vale of Wrath fort).
Transmutations: Fire (Ch.1), Stasis (Ch.4, Caverns > Weeping Ledge), Shield (Ch.8, top of the stairs after the chandelier jump in the University). Pops when the ninth, the
Shield, is in your hands.
Tip: With the Shield unlocked you can also go for
Jackknife: damage with all nine in one life.
Full guide → 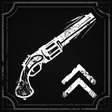
Gun of Glory
Details
Silver — Upgrade a single Firearm to maximum. Upgrade one Firearm to
level 10. There are enough Firearm Parts to bring all three guns to level 9, but there's only
one Masterwork Firearm Part in the game, so only one gun can reach 10. Costs: Lv2–4 take 1/2/3 Standard, Lv5–7 take 1/2/3 Superior, Lv8–9 take 1/2 Exquisite, and Lv10 takes 1 Masterwork.
Masterwork location: University > Main Hall (Ch.8). Go back to where you jumped across the chandelier toward the Shield and head the other way, through the poison corridor, down the next lift and through the lower library. Out the back is a lecture hall with hanging bodies: the chest is under the balcony at the far end.
Tip: Since you only get one, put it into the gun you actually use. The Pistol is the most useful for weak points and several trophies.
Full guide → 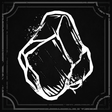
Ambersmith
Details
Gold — Gather all Ambers. Pick up
every unique Amber at least once. Ambers are this game's equipment: passive effects such as health regeneration, longer parry windows or damage boosts after dodges. There are
29 different Ambers in the Inventory > Ambers list, spread across more than 50 pickups. Fifteen of them can be found more than once, and duplicates upgrade the Amber to level 2 and 3.
Duplicates aren't needed for the trophy. They come from chests, miniboss kills and side quest rewards, and
none are missable, since every area stays open after the credits.
Tip: The game doesn't track pickups, so use the Inventory > Ambers menu (same order as our table) to see which unique ones you're missing. Several come from
side quests (Sleight of Hand, Bountiful Harvest, Tomorrow's Promise, Butcher's Carnage, Wound that Heals, Bottomless Well), so do every quest.
Full guide → 
Transmutation Artifex
Details
Silver — Upgrade a single Transmutation to maximum. Upgrade one Transmutation to
level 5. Costs: 2 Crude, 2 Pure, 2 Distilled, then
1 Quintessential Transmutation Material. There are only
two Quintessential in the game: the reward for the
Monster Hunt side quest (City of Orphans, Ch.7), and a chest immediately to the left through the gate you open by lighting both signal fires near
Fortress > Traverse (Ch.9).
Tip: Put one into the Shield. Shield level 5 unlocks
Shield Bash, which the missable Abyssal Eviction needs, and it pops this trophy at the same time. Spend the second wherever you like.
Full guide → 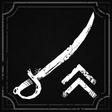
Bladesmith
Details
Silver — Upgrade a single Melee Weapon to maximum. Upgrade any one Melee Weapon (Saber, Rapier or Claymore) to
level 10. You use
Blade Materials found in chests and the world, or buy them from the Abandoned Church. There are enough to max
all three, so this is the easy one. Costs: Lv2–4 take 1/2/3 Crude, Lv5–7 take 1/2/3 Pure, Lv8–9 take 1/2 Distilled, and Lv10 takes
1 Quintessential Blade Material. There are three Quintessential: in the side lab next to Experiment 83 (Outskirts > Lighthouse, Ch.7), in an exploding chest in the Fortress Chapel underground (Ch.9), and in the Oathbound secret room.
Tip: Upgrades can't be farmed, because enemies don't drop materials, so open every chest. The
Claymore is a strong choice to max: its stagger carries the final bosses.
Full guide → Combat & Miscellaneous 16 trophies
Sixteen trophies for specific kills, combos and jokes. Almost all of them can be done at one Lantern: Fallen Village > Marketplace, where a barn spawns a group of five villagers every time you rest. Only one, Abyssal Eviction, is missable, and only if you spend both Quintessential Transmutation Materials on something other than the Shield.
Aerial Annihilation
Details
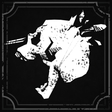
Bronze — Kill an enemy with a headshot after a wall jump. Kill an enemy with a
headshot right after a wall jump. First unlock
Airborne Aiming in the third column of the skill tree, which slows time while you aim in mid-air. Best spot:
The Outskirts > Broken Bridge (Ch.7). The climb past the Lantern has wall jumps and grapples, and on the second and third wall jumps an enemy stands right in front of you. The killing shot must be a headshot, but you can soften it with a first shot. The
Musket one-shots normal soldiers.
Tip: Miss it? Rest at the Lantern to respawn the enemies and try again. The skill tree can be reset with Catalysts any time, so the skill costs you nothing for long.
Full guide → 
Scattershot
Details
Bronze — Kill 5 enemies with a single Blunderbuss shot. Kill
5 enemies with one Blunderbuss shot. You'll need a few upgrades: about
level 6 with the
Collateral Damage (wider spread) upgrade does it. Spot:
Fallen Village > Marketplace. Walk into the barn in front of the Lantern and five villagers rush you. Stand in the
doorway, block until they bunch up, then fire point-blank into the crowd.
Tip: Not all five died? Rest at the Lantern and they're back. This same barn works for Hood-Snatcher and Flaming Feast.
Full guide → 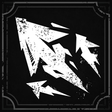
Windhover
Details
Bronze — Kill 3 enemies with a Pistol while aiming in mid-air. Kill
3 enemies with the Pistol while aiming in mid-air. They're
cumulative, so they don't need to be in one jump. Use the same wall-jump spot as Aerial Annihilation (
The Outskirts > Broken Bridge) with
Airborne Aiming unlocked, and make sure the kills come from the
Pistol.
Tip: Rest at the Lantern between attempts to reset the enemies. It's easy to get both trophies in the same session.
Full guide → 
Hood-Snatcher
Details
Bronze — Decapitate 3 enemies with a single Claymore attack. Decapitate 3 enemies with one Claymore attack. The Claymore arrives at the end of Chapter 6. It's two-handed (no parry) but hits hard, with Nephtoglobin-powered special attacks. Go to the
Fallen Village > Marketplace barn, let the five villagers group up in the doorway, then
hold the attack for a charged Claymore swing across the front of the pack.
Tip: Rest and repeat if fewer than three heads come off.
Full guide → 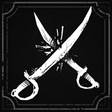
Symphony of Steel
Details
Bronze — Perform 10 Parries without taking damage. Perform
10 parries in a row without taking damage. Blocking an attack instead of parrying it costs a bit of health and resets the count. Find a single basic human soldier, stand in front of it, and parry every swing until you reach 10. It comes naturally if you play parry-first.
Tip: The early Battlefield soldiers have slow, readable swings, which makes them ideal.
Full guide → 
Flaming Feast
Details
Bronze — Set 4 enemies on fire with a single Flamethrower use. Ignite 4 enemies with a single Fire use. Holding Fire on enemies fills their Ignite meter until they catch fire. They all need to reach Ignite during
one continuous cast, but you don't have to kill them. If something interrupts you before anyone ignites, just start again. Spot: the
Fallen Village > Marketplace barn. Trigger the five villagers, back off so they bunch up, and sweep Fire across them.
Tip: The
Lunatic's Grasp Amber speeds up Ignite buildup, which makes this one much easier.
Full guide → 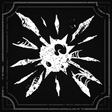
Statue of Insanity
Details
Bronze — Fully lock Sergeant Gaspard 'Cannonhand' Dubois in Stasis. Fully freeze Sergeant Gaspard 'Cannonhand' Dubois with Stasis. He's a 'Remnant of the Iron Regiment', the Iron Marshall's type, and appears as a regular enemy from Chapter 5. From
Vale of Wrath > Wolfsbane Field, clear the wall by destroying its two weak spots; one of these enemies is on the path ahead. Hit him with Stasis until
every Stasis orb above his health bar is filled.
Tip: Killed him by accident? Rest at the Lantern to respawn him.
Full guide → 
Abyssal Eviction
Details
Bronze — Kill an enemy by pushing them into the abyss with Shield Bash. Missable. MISSABLE. Kill an enemy by knocking it into the abyss with
Shield Bash, which unlocks at
Shield level 5. That takes one of the only
two Quintessential Transmutation Materials in the game, so if you spend both on Fire and Stasis, this trophy is gone. Once you have Bash: from
Fortress > Traverse (Ch.9), go up the hill, through the gate and along the path round the outside of the castle. Two human enemies attack as you head into the tower. Lead them out onto the
wooden platform, raise the Shield and Bash them over the edge.
Tip: Bash only knocks enemies back a little, so get the enemy's back right to the drop. Rest at the Lantern to reset as often as you need.
Full guide → 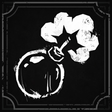
Single Stroke
Details
Bronze — Shoot off a Risen Grenadier’s bucket. Shoot off a Risen Grenadier's bucket. Grenadiers appear from Chapter 2 in the Valley of Ashes. They hang a
bucket of grenades at their waist, and one shot destroys it, ending their grenade throws and earning the trophy.
Tip: You'll likely get this by accident on the first Grenadier near Guidepost.
Full guide → 
God's Trigger
Details
Bronze — Land 10 consecutive headshots or Weak Point hits without missing. Land
10 headshots or weak-point hits in a row without missing a shot. Melee in between doesn't break the streak, a second shot on a head that's already broken still counts, and multi-hit weak spots (like a Grenadier's arm) count too. The Pistol or Musket makes it easiest. For a dedicated attempt, warp to
The Battlefield > Onslaught Arch and headshot your way through the armed soldiers on the battlefield.
Tip: Take your time: one stray shot into a wall resets the count.
Full guide → 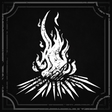
Frenzied Flame
Details
Bronze — Ignite the bonfire in the castle. Light the bonfire in the castle, a nod to FromSoftware's bonfires. From
Fortress > Chapel (Ch.9), head into the underground until you reach a sewer room with a door on the left after a
pole jump. Go through, turn left at the bottom of the stairs, then go down a
second flight. In the room on the left is a
sword stuck in the ground: use
Fire on it.
Tip: The same underground area has the second Quintessential Blade Material (turn right at the bottom of the first stairs), the Captain's Key and the Fortress Armoury Key.
Full guide → 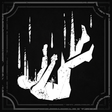
Mind the Gap
Details
Bronze — Die by falling into the abyss. Die by falling into the abyss. Falling off a ledge costs health and puts you back on solid ground. Keep jumping off the same ledge until your health runs out.
Tip: Do it right next to a Lantern with no Catalysts on you, so nothing is lost.
Full guide → 
Rookie Mistake
Details
Bronze — Attempt to use a Ferrofluid Flask with none remaining. Try to drink a Ferrofluid Flask with none left. Use up your flasks, then press heal once more. Easiest early on, when you only have a few flasks.
Tip: Pair it with In the Nick of Time: once the flasks are gone, you're already halfway there.
Full guide → 
In the Nick of Time
Details
Bronze — Interact with a Lantern while below 20% Health and with no Flasks remaining. Rest at a Lantern below 20% health with no flasks left. There's no health number, so judge it by the bar: around the length of the
small segment on the purple Nephtoglobin bar under it is roughly 20%. Burn your flasks, take chip damage by
blocking until you're that low, then use a Lantern.
Tip: Easy freebie: use every flask during the scripted
Chapter 1 Lothaire loss. You arrive at the next Lantern with so little health that this pops by itself.
Full guide → 
Fight Fire With Fire
Details
Bronze — Ignite an enemy while you are also Ignited. Ignite an enemy while you're on fire yourself. Stand in an environmental fire (campfires are common) to ignite yourself, then hit an enemy with the Fire Transmutation until it ignites. Spot:
Caverns > Last Sunlight. Pull one enemy from the first cave back to the campfire near the entrance.
Tip: Ignite eats your health quickly, so be ready to heal or step out once it pops.
Full guide → 
Jackknife
Details
Bronze — Deal damage with every Melee Weapon, Firearm, and Transmutation without dying. Damage enemies with all nine weapons and Transmutations without dying. Possible once you have the
Shield (Chapter 8). Warp somewhere easy, such as the start of the Battlefield, and cycle Saber, Rapier, Claymore, Pistol, Blunderbuss, Musket, Fire, Stasis and Shield on weak enemies.
Tip: If it doesn't pop, cycle through again and apply a
full Fire and Stasis effect, not just a tick.
Full guide → FAQ
Valor Mortis platinum — quick answers
How long does the Valor Mortis platinum take?
About 15–25 hours, all in one playthrough. A full run of the story is roughly 20 hours, and how fast you learn the parry decides where you land.
Is the Valor Mortis platinum hard?
Around 5/10. There are no difficulty settings and no difficulty trophies, so everyone plays the same game. The hardest trophy is simply beating the final boss, the Entity (In His Own Image). The skill trophies are all easy at the Marketplace barn.
Are there missable trophies in Valor Mortis?
Only
one: Abyssal Eviction. It needs Shield Bash, which unlocks at Shield level 5, and there are only
two Quintessential Transmutation Materials in the game. Spend one on the Shield and nothing else can be missed. Every area, Amber and side quest stays available after the credits. See the
chapter walkthrough.
Can you explore after beating Valor Mortis?
Yes. After the Entity you're returned near the last Lantern with free roam, and you can fast travel to every region to finish quests, Ambers and the Oathbound hunt. New Game+ isn't in the launch version; the developer says it's coming in a later 2026 patch.
How many Ambers are there for Ambersmith?
There are
29 unique Ambers, and you need one of each. Duplicates only upgrade them. The
Ambers page lists all of them with every location, in the same order as the in-game menu.
Where are the Oathbound Eternal Guardsmen?
Seven of them: Valley of Ashes (Demolished Path), the Battlefield (Onslaught Arch), Caverns (Old Mine), Fallen Village (Marketplace), Cursed Hollow (Deep Water), City of Orphans (Shamble Street, needs the Shield) and the Fortress Courtyard. Exact routes are on our
side quests page.
Are there online trophies or manual saves?
No online trophies; all 39 are offline. There are no manual saves either: one save file, and Back to Menu from the pause menu saves exactly where you stand.
 · 3
 · 14
 · 21
