Chapter Walkthrough
Our chapter-by-chapter route through Final Fantasy Resonance: where to go, every story boss with its weakness, the dungeon puzzles, and everything you can collect in each chapter, including every Tablet Shard in order. Nothing in the game is missable, so use this to collect as you go and save yourself the post-game backtracking.
Chapter 1: Tailing the Truth
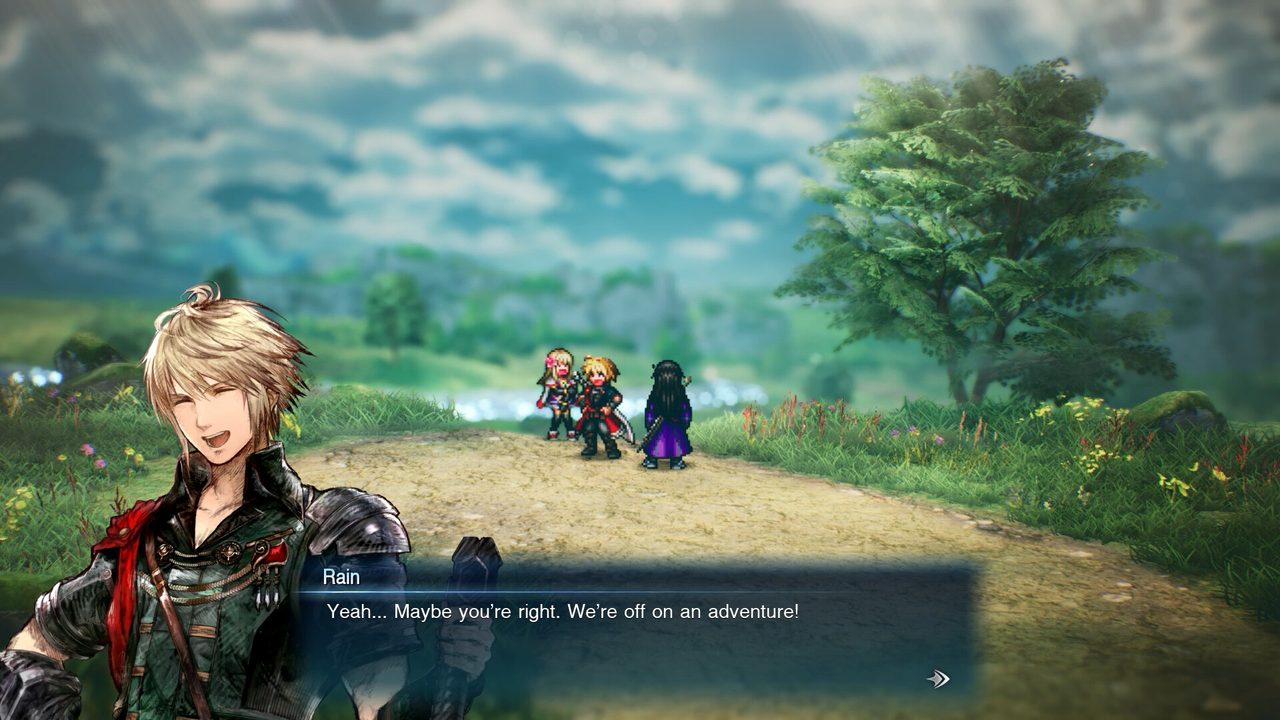
Kingdom of Grandshelt. Rain and Lasswell's story begins, Fina joins, and you leave on a ship from Grandport. Recommended to collect: the three early Sanctums and the Marauder.
The route
- Earth Shrine: before climbing the big staircase, go east underneath it for the Nodachi; north-east to the save point, then the final chamber.
- Town of Mitra: enter Rain's old house (blue roof) and check the inner door: the scene gives you the Leah and Tronn Visions. Equip them under Equipment & Abilities.
- Grandshelt Castle under attack: fight through with Charlotte; Hell's Rider is on the 2nd floor, then a throne-room fight with Umbra you're meant to lose.
- Village of Kol: rest at the inn; next morning the stablehand lends you a chocobo for the desert. A whirlpool in the desert starts the optional Antlion fight.
- Felicitas, then the Kolobos Ruins: climb the linked staircases; on the 2nd floor a Tablet Shard is behind the fallen pillar, and the boss is on the 3rd.
- Grandport and Siren's Tower: the sailor won't sail until Siren is gone. In the tower take the north path to the big staircase, west at the first fork to the lift, and the north-east passage for the Monk's Prayer Beads (Charm protection). Climb to the green portal.
Weak to Fire: use it to build stagger.
Inflicts Poison: bring Antidote Herbs.
Weak to Light. It revives once and calls in extra enemies, so keep healing through phase 2.
Level 11, weak to Lightning (equip Tronn). She uses Charm and heavy attacks: heal and cure Charm. She becomes your first Esper.
Don't miss
- Visions: Tronn (Rain's old house in the Town of Mitra (north-east Grandshelt), during the Chapter 1 story); Leah (Same scene in Mitra; her Resonance heals, which makes her the best Resonance-farm Vision early on); Warrior of Light (Grandport island, just north-west of the Village of Kol); Cloud (Grandport island, just north-east of Siren's Tower (north-west of Marauder Cave)); Terra (Kolobos island, south-west of the Town of Felicitas, on the island's west side); Clive (Grandshelt island, south-west of the Town of Mitra and just south of the Earth Shrine. Go back for it if you can't reach it the first time)
- Espers: Siren (story).
- Cave Masters: Marauder (Grandport island desert, just east of Siren's Tower, Lv 15, weak to Wind)
- Oblivion Palace (just south-east of Grandport Harbour): hand in 3 Tablet Shards for Princess's Reward.
- Marauder Cave (just east of Siren's Tower): level 15, weak to Wind, for Magicite Hunter.
- Trophies this chapter: A Journey Begins, Kweh!, Princess's Reward, Magicite Hunter
Tablet Shards in Chapter 1 (12)
| # | Area | Spot |
|---|---|---|
| 1 | Grandshelt, the Royal Capital | Commercial District (east path from the main entrance), left of the weapon and item stalls among crates. |
| 2 | Village of Kol | Left side of the pool in the south-west of the village. |
| 3 | Town of Felicitas | From the entrance cross the wooden bridge east; just right of the stone wall ahead. |
| 4 | Town of Felicitas | Cross the bridge west, turn left at the torch onto a hidden path and climb the ladder; behind the wall on the left. |
| 5 | Kolobos Ruins | Second area, down the entry steps, behind two grey-green cylinders. |
| 6 | Kolobos Ruins | After the bridge collapses and the fight, climb the ladder and the next stairs; behind a fallen stone pillar just below. |
| 7 | Grandport Harbour | South of the item shop, down the wooden pier, behind barrels on the right. |
| 8 | Grandport Harbour | Just west of the weapon and armour shop, at the foot of a tree. |
| 9 | Cavern of Swords | Behind the stalagmite at the end of the cave. |
| 10 | Siren's Tower | Past the fountain, up the right-hand stairs, on the edge of the ledge. |
| 11 | Siren's Tower | Top of the first area's staircases, before the room, at the end of the right ledge. |
| 12 | Siren's Tower | Next room, up the stairs and left, at the end of a visible ledge. |
Chapter 2: Eternal Blue
Dirnado, the Continent of Wind. Lid joins, and Mechabo's questline starts at the Dwarven Forge.
The route
- Dilmagia: talk to the marked residents, then meet Lid at the shipyard; she joins.
- Mt. Thunderclap: pay Lid 1,000 gil for the shorter route or take the long one (a Tablet Shard on each). Ramuh's upper entrance is reached later by going south past the Sanctum of Zidane.
- Dwarven Forge: talk to Borin. Mobliz Shipyard: win the opening fight, take the west lift up and hit the glowing switch in the fenced room to power the central lift, then the north-east switch. In the escape Lid opens the south-east control room: pull lever 16 only.
- Wind Shrine: hit the switch by the entrance and follow the stairs and platforms down; grab the supplies at the big staircase and save before the last chamber.
- After the Mobliz events, go back to the Forge and talk to Verun for Arise, Mechabo! (2 Dynamo Stones from the Ipooh bears outside).
Weak to Earth.
At low HP it splits into four Great Bombs: kill them all.
Weak to Water or Lightning.
Weak to Ice.
Don't miss
- Visions: Zidane (Dirnado, east of the Dwarven Forge and north of Dilmagia, on the path south towards Mt. Thunderclap); Noctis (Dirnado, just west of the Mobliz Shipyard (south of the Chamber of Arms)); Onion Knight (Dirnado, south-west of the Dwarven Forge (west of Dilmagia), near the south-west coast)
- Espers: Ramuh (Mt. Thunderclap's upper entrance: interact with the monument past the save point; level 20, weak to Earth).
- Cave Masters: Shoggoth (Dirnado's east coast, just north of Mt. Thunderclap, Lv 25, weak to Water, Earth)
- Shoggoth Cave (just north of Mt. Thunderclap): level 25, immune to physical attacks: Water or Earth magic.
- Elven Maven (Silvia in Dilmagia): search the Mt. Thunderclap plants; Magicite Shard and 800 gil.
- Trophies this chapter: Those Who Unite the Skies
Tablet Shards in Chapter 2 (15)
| # | Area | Spot |
|---|---|---|
| 13 | Dilmagia, the Machinopolis | First side area on the left after entering (NPC and a closed gate with electric lights), in the corner. |
| 14 | Dilmagia | Second junction of the main street (notice board west, shops east), behind a stack of wooden crates. |
| 15 | Dilmagia Shipyard | Up the first stairs, then the stairs left of the main platform; end of that path beside a ladder. |
| 16 | Dilmagia Shipyard | Up the first stairs, then down the stairs right of the main platform; next to the third metal girder. |
| 17 | Mt. Thunderclap | On the harder route (don't pay Lid 1,000 gil), in plain sight just past the yellowish tree used for the Elven Maven sub quest. |
| 18 | Mt. Thunderclap | On the easier route (pay Lid 1,000 gil), up the long ladder and along the path, beside a tree. You can teleport back and take the other route. |
| 19 | Mt. Thunderclap (upper entrance) | The Ramuh route: down the small stone ramp, hidden behind rocks. |
| 20 | Dwarven Forge | South-west corner of the main area: cross a wooden bridge and go south to the end of the path. |
| 21 | Dwarven Forge | North-west of the main area, down the steps towards the Mom Bomb fight, at the south end of the path. |
| 22 | Mobliz Shipyard | Head west in the first area, behind crates. |
| 23 | Mobliz Shipyard | First lift up, east through a gap in the fence into the generator area, down the ladder in the south-east corner, then west. |
| 24 | Mobliz Shipyard | After the second lift go north; just before the fenced area with another lift, behind a shipping container. |
| 25 | Wind Shrine | First room, behind the right-hand pillar (instead of taking the lift with four green crystals). |
| 26 | Wind Shrine | A few lifts later, at a lift on top of a staircase, in the gap between the stairs and the right railing. |
| 27 | Wind Shrine | From the previous shard go south and take the next crystal lift; left side of that platform. |
Chapter 3: Wardens of the Aquapolis
Olderion Federation. Nichol joins, the city floods, and the Water Shrine has the game's first real puzzle dungeon.
The route
- Olderion: talk to three marked residents. Cave of Waters: Nichol joins; glowing switches move the boats, take the north route.
- Back in Olderion, visit the marked water spots and Old Town, then Lake Dorr. Rest at the Olderion inn to trigger the flood.
- Waterfall Way (west), the Altar of the Water Maiden, the Town of Amore.
- Water Shrine: boat to the first switch (optional: boat north through the waterfall for Scale Mail and a Magicite Shard). Back at the entrance take the south-east ladder down, go east and hit the switch, push the crate, then hit switches Left, Right, Left for a hidden room with the R'lyeh Text. Go west then north to the water controls: lower the water, boat to the box, push it up, raise the water again, boat to the big central switch, and save before the boss.
- Finish the story in Olderion and take the ship to Zoldaad.
Weak to Ice.
Weak to Lightning.
Weak to Lightning; keep HP high for its big attacks.
Weak to Lightning.
Don't miss
- Visions: Firion (Olderion, south-west of the Aquapolis and south of Waterfall Way, beside Ruby Cave); Tidus (Olderion's west side, just west of the Secluded Dwelling); Squall (Olderion's east side, south-east of Lake Dorr)
- Espers: Carbuncle (Ruby Cave, no fight: three Ruby Fragments; see the Espers page).
- Cave Masters: Rukh (Olderion, south of the Aquapolis, Lv 26, weak to Wind); Mindflayer (Olderion, west of the Town of Amore, Lv 28, weak to Earth)
- Rukh Cave (south of the Aquapolis) and Mindflayer Cave (west of Amore): levels 26 and 28.
- Trophies this chapter: Olderion Blues, The Bigger They Are...
Tablet Shards in Chapter 3 (15)
| # | Area | Spot |
|---|---|---|
| 28 | Olderion, the Aquapolis | Right at the entrance, beside the boat-tour NPC, just right of the central platform. |
| 29 | Olderion | Due north of the entrance at the pool with two statues, next to the bench behind the left statue. |
| 30 | Olderion | From the statues go north-east past the giant water wheel; on a stone bridge behind the plant pot. |
| 31 | Olderion | Back at the statue pool, up the steps to the north, behind the tree. |
| 32 | Cave of Waters | After the boat maze on the story path, just left of the dock on the far side. |
| 33 | Cave of Waters | After the long boat maze, through a door, in front of the waterfall (save point and ladder room). |
| 34 | Cave of Waters | When the story brings you back, a hidden path opens in the room left of the entrance; climb a couple of ladders. |
| 35 | Waterfall Way | Second room (the one after the save point on a revisit), up the stairs and east, beside a ladder. |
| 36 | Waterfall Way | The big waterfall room with stone platforms, on one of the platforms. |
| 37 | Waterfall Way | Same room, north over the wooden bridges, on a rock between the waterfalls. |
| 38 | Town of Amore | South of the weapon and item shops, next to a well on a small grassy island. |
| 39 | Town of Amore | North of the item shop, before the long bridge, by a tree on the right. |
| 40 | Water Shrine | Round central platform with four cross-shaped paths: down the north stairs once the water is lowered. |
| 41 | Water Shrine | Area with several water-level crystals: take the boat north-east past the balcony with the friendly Viridian Pot; on a ledge to the right. |
| 42 | Water Shrine | After lowering the water further, at the bottom of a long ladder, just to its left. |
Chapter 4: Banner Oath
Zoldaad Empire Territory. Jake joins, you infiltrate the castle, and the chapter ends with the airship. The Grandshelt Colosseum reopens.
The route
- Mozul Station by train, then the Imperial Capital; follow Jake through the tunnels to the Rebel Hideout and rest.
- Weapons Factory: lose the scripted fight with Ignis, then west, up the ramp and hit switch 1; down the ladder for the lower switch, up two ladders to the walkway, east to the next switch and extend the bridge; drop the ladder for a shortcut, hit the north-west switch, then climb by the save point and work the last switches until the path joins.
- Zoldaad Castle: you're captured. Escape the cell, central stairs, north then west; beat the guard with the Dungeon Key and open the cells. In the main castle go west for a required fight, then upstairs to the captain's room (upper right) for the Throne Room Key; talking works instead of fighting.
- After Emperor Sosa, the optional Kaiser Sword is to the left of the throne. The chapter ends aboard the Enterprise.
First a scripted loss; the real fight is weak to Water.
Weak to Water.
Weak to Earth. He summons Test Subjects No. 9 and No. 999 and The Hunger v5 (weak to Light): juggle targets.
Don't miss
- Visions: Shantotto (Zoldaad, just east of Mozul Station, where the train first drops you); Cecil (Zoldaad, just north-west of the Rebel Hideout); Y'shtola (Zoldaad's south-east, just south of the Weapons Factory)
- Espers: Titan, once you win the Colosseum's Fledgling Battle 5 (Gaia Hammer); his Sealing Stone is in the desert between Siren's Tower and Kol.
- Cave Masters: Gogmagog (Zoldaad, just south-west of the Rebel Hideout, Lv 34, weak to Wind, Light); Pyroviper (Zoldaad, south of the Weapons Factory, Lv 37, weak to Water)
- Colosseum (west side of Grandshelt): Fledgling League, recommended level 25–32, with an Adamantite, the Ancient Greatsword and the Gaia Hammer.
- Gogmagog Cave (south-west of the Rebel Hideout) and Pyroviper Cave (south of the Weapons Factory).
- Trophies this chapter: Viva la Revolución, Just Getting Started, Keep Them on Their Toes
Tablet Shards in Chapter 4 (16)
| # | Area | Spot |
|---|---|---|
| 43 | Mozul Station | South-west corner of the station. |
| 44 | Capital Station | Beside the eastern staircase (enter from the south on the world map and you spawn next to it). |
| 45 | Zoldaad, Castle Plaza | Directly east of the tram stop. |
| 46 | Zoldaad, Residential District | South-east corner. |
| 47 | Zoldaad, Slums | Just east of where you arrive, next to barrels. |
| 48 | Zoldaad, Underground Tunnel | East to a metal walkway, down the stairs, back west down a small ramp and south: corner of the room. |
| 49 | Zoldaad, Underground Tunnel | Further in, south past the Pot's room towards a metal bridge: a hidden entrance under the bridge leads up to a room on the right. |
| 50 | Rebel Hideout | Jake's room (rock door with two red-and-white flags) in the north-west: walk behind it along a hidden path to the crates on its left, climb the ladder, a few steps south-west. |
| 51 | Rebel Hideout | North-east area: facing the exit to the conference room, up the stairs on the right, behind a metal pillar by the railing. |
| 52 | Weapons Factory | Lava-floor area: all the way west, up the stairs and across the platforms to a crystal switch; press it, cross the girder that rises, turn left. |
| 53 | Weapons Factory | Lava area: climb the long ladder by the save point to the three-switch platform, turn the left switch three times; straight north from the ladder, second left. |
| 54 | Dungeon | With the Master Key, go south to the second block of cells: first cell on the right. |
| 55 | Dungeon | With the Master Key, back in the room where you were locked up: the newly opened cell on the west side. |
| 56 | Zoldaad Castle | Behind the left of the two horse statues by the throne-room stairs. |
| 57 | Zoldaad Castle | Up the throne-room stairs, right-hand hallway, first door: south-east corner. |
| 58 | Grandshelt Colosseum | Leave Grandshelt by the west exit; all the way west along the starting path. |
Chapter 5: Scars of Time
The airship opens the world. Find hidden Mysidia, Sakura completes the party, and the mid-game side content opens up.
The route
- Finding Mysidia: finish the airship radar tutorial, then fly over the sea south and slightly east of Pharm and use Radar Pulse, following Lid's hints until the island appears.
- Mysidia, the Magiapolis: Sakura joins at her house; then the Potion Factory.
- Village of Sunioo, then the Nameless Ruins (two marked bosses on the 2nd floor, then a scripted fight with Tellus).
- Arcane Library: beat all five Monster Tomes, take the blue portal, beat the boss and use the marked book to enter Fina's Psyche.
- Tower of Mysidia (west side of the island), then Fina's Psyche again: talk to every member of the Sworn group at the Aldorian base, then go back through the Battlefield checking the flowers.
Weak to Wind.
Weak to Fire or Dark.
Weak to Wind.
Don't miss
- Visions: Bartz (Mysidia, just north of the Magiapolis (east of the Tower of Mysidia); airship); Lightning (Mysidia's south, east of the Nameless Ruins and south-west of the Village of Sunioo; airship); Vaan (Mysidia's west side, right next to Victoria's Shrine (west of the Tower of Mysidia); airship. At MR 9 he teaches Double Gil); Sephiroth (Whirlpool Hollow: the whirlpool in the sea beside the big bridge, north-west of Grandshelt, the Royal Capital. Land the airship on it. Level 45, 250,000 HP (full strategy below)); Camille (Imperial Residences, Zoldaad: investigate the abandoned station in the south, question the Phantom Train passengers and find the false testimony); Wilhelm (Zoldaad Castle Plaza, after Camille's quest: find the two camps, talk to Ozetta, visit the Weapons Factory, then the reporter at the inn); Aileen (Dilmagia: look for the rebellion's leader at the shipyard, gather news of Aileen in three regions, then answer her questions at the shipyard. Also recruits her as a blacksmith); Victoria (Mysidia: the potion factory, Victoria's Shrine by the Tower of Mysidia, the black lizards on a nearby island, then scatter the vanishing powder from a high point. Her MR 7 passive gives +50% MRP); Amelia (Zoldaad (after Jake's Token Legacy): show her wanted poster to Shera at the castle, look for her in Olderion and Waterfall Way, then check the posters are gone)
- Espers: Ifrit (fly into the volcano in south Zoldaad), Shiva (snowstorm on Mysidia's west side), Leviathan (Nichol's Duty).
- Cave Masters: Salome (Mysidia, right next to (south of) the Village of Sunioo, Lv 39, weak to Wind); Jotunn (Mysidia's west side, south of Victoria's Shrine, Lv 42, weak to Fire, Dark); Malboro Varietas (Island north-east of the Water Shrine (Olderion), Lv 45, weak to Fire); Tartarosaurus (Pharm, the island north-east of Mysidia, Lv 50, weak to Ice); Catacumba (Southern Gronoa, south-east of the Sanctissimus Shrine, Lv 54, weak to Light, Fire); Malboro Menace (Northern Pharm, north of the Abandoned Cabin, Lv 60, weak to Fire); Titanoraidos (Western Pharm, right beside Mt. Reizan, Lv 60, weak to Ice)
- Substories open by now: Beyond the Blue (Lid, the shipyard in Dilmagia); Nichol's Duty (Nichol, Olderion, the Aquapolis)
- Sephiroth at Whirlpool Hollow (level 45): see the Visions page.
- Chamber of Arms (Dirnado's north-west tip) and Chloe's Ancient Bow (Felicitas item shop).
- Sub quests: Forger of Wills (Aileen), The Call from Beyond (Camille), O General! My General! (Wilhelm), Victoria Revivified, Mechabo Unleashed.
- Cave Masters now in reach: Salome, Jotunn, Malboro Varietas, Tartarosaurus, Catacumba, Malboro Menace and Titanoraidos (levels 39–60).
- Trophies this chapter: In Search of the Truth, Airship Enterprise, Those Who Defy Fate, Esper's Covenant
Tablet Shards in Chapter 5 (17)
| # | Area | Spot |
|---|---|---|
| 59 | Mysidia, the Magiapolis | From the main entrance down the right-hand stairs to the teleport crystal, tucked in a corner behind an NPC. |
| 60 | Mysidia (Storefront) | Directly south of the weapon shop, next to two crates. |
| 61 | Mysidia | West past the item shop into the blue teleporter; in the fountain area, by the second pillar on the right. |
| 62 | Arcane Library | Ground floor: through the blue portal, south-west of the entrance room among the writing desks (left side). |
| 63 | Village of Sunioo | At the entrance, a couple of steps up, between a bench and a pot. |
| 64 | Village of Sunioo | Far north-east of the village, beside a snowman outside an igloo. |
| 65 | Nameless Ruins | First room, as far west as you can go, beside a fallen pillar. |
| 66 | Nameless Ruins | Second area, just south of the save point down some stairs, beside a fallen chandelier. |
| 67 | Arcane Library | Only after the Nameless Ruins: final room with the second save point, climb the ladder just east and walk all the way round the balcony to the west. |
| 68 | Fina's Psyche (part 1) | Just left of the big padlocked gate, under a chain. |
| 69 | Fina's Psyche (part 1) | West of the gate, inside the westernmost tent, among crates in the top-right corner. |
| 70 | Fina's Psyche (part 1) | Far end of the third area west of the gate (after the first padlock opens), in a clearing. |
| 71 | Tower of Mysidia | Top of the main entrance, up the stairs behind the large crystal. |
| 72 | Tower of Mysidia | Further up the spiral staircase, on a landing. |
| 73 | Tower of Mysidia | Further up, on a landing on the story path before the Azure Pot. |
| 74 | Tower of Mysidia | On a snowdrift on the story path after the Azure Pot. |
| 75 | Fina's Psyche (part 2) | Over the bridge into the next area, north to a small army camp, behind supplies in the bottom-right corner. (You can re-enter Fina's Psyche later through a magic book in the Tower of Mysidia.) |
Chapter 6: Tranquility
Gronoa, the Shuttered Land. Miasma blocks most of the region until Fina learns Holy, and the chapter ends with a long boss gauntlet.
The route
- Research Centre Ruins: level 1 card in the first room; west to the westernmost teleporter and hit all 3 switches for the level 2 card; east room teleporter to a split (optional Fortress Gear: Right, Left, Right); main route left teleporter and up the ladder for the level 3 card; use it in the north section for the White Jade Stone and take it to the Gaberada elder. Fina learns Holy.
- Gaberada radar upgrade: behind the inn on the north side, take the hidden stairs on the west and talk to the man there for the Magi-tenna. It unlocks two Legendary Arms and an Adamantite, and Aileen's crafting.
- Rugged Mountain Path: a hidden east path has the Kumobashiri; Lux waits at the save point. Adamantite is in a brown chest near the start.
- Town of Duggle, then the Gronoa Shrine (west at the first fork for a Magicite Cryst, then north-east, ladders and the lift).
- Sanctissimus Shrine: a run of back-to-back bosses, so bring every element. The Hero's Blade is in a hidden west passage before the last lift. Rain learns The Power Within after the scene with Lasswell.
Weak to Dark.
Weak to Fire or Light.
Its weakness changes: check it and adapt.
Weak to Fire.
Weak to Light or Earth.
Weak to Dark or Wind; switch between physical and magic as its protection changes.
Weak to Light or Wind; kill them together.
Weak to Lightning; heal steadily.
Weak to Fire. Ends the chapter.
Don't miss
- Espers: Odin (Iron Splitter, after Holy).
- Substories open by now: Shimmering Reflections (Fina, Mysidia, the Magiapolis); Token Legacy (Jake, Zoldaad (rest at an inn to trigger it)); Last Respite (Archwitch Fina, Grandshelt, the Royal Capital); Mysidia, Ever Blooming (Sakura, Mysidia, the Magiapolis)
- Aileen's crafting opens on the airship deck.
- Merchant Ship Adamantite (35,000 gil).
- Substories: Shimmering Reflections, Token Legacy, Last Respite, Mysidia, Ever Blooming.
- Trophies this chapter: And the Winner Is..., The Weapon that Suits the User
Tablet Shards in Chapter 6 (12)
| # | Area | Spot |
|---|---|---|
| 76 | Gaberada, the Undertown | Right side of the house at the north-west end of town. |
| 77 | Research Centre Ruins | Level 1 card route (west of the entrance room), room with desks and a green teleporter. |
| 78 | Research Centre Ruins | Level 1 route, room where you switch on three consoles, on top of the shelves in the south-east corner. |
| 79 | Research Centre Ruins | Level 2 card route (east), the room full of green teleporters: after them climb the long ladder; on the gantry to the right. |
| 80 | Rugged Mountain Path | Just west of the first save point, under a dead tree. |
| 81 | Rugged Mountain Path | East of the second save point and down a ramp, in the corner. |
| 82 | Town of Duggle | North of town, just east of the weapon/item shop entrance, half-hidden behind the waterfall. |
| 83 | Gronoa Shrine | Leaving the first room, at the south end of the landing before either staircase. |
| 84 | Gronoa Shrine | Down the west stairs, all the way south, then the east path: on a staircase blocked by a fallen pillar. |
| 85 | Gronoa Shrine | Down the long ladder on the story path, west and up a parallel ladder, then south, against another broken pillar. |
| 86 | Sanctissimus Shrine | From the second save point go north to the long room with a tombstone; behind the north stairs go east into a hidden room under the torch, up the stairs, and climb the ladder by the Violet Pot. |
| 87 | Sanctissimus Shrine | From the third save point climb to the crystal-lift room; after the third lift, grab it before taking the fourth. |
Chapter 7: Reckoning
Kingdom of Pharm. You refight the Sworn Six one by one.
The route
- Fly the Enterprise into the big tornado south of Pharm.
- Town of Sian: go north to talk to Ayaka.
- Mt. Reizan: a Tablet Shard at the south-west dead end; the High-Power Generator chest (Ancient Hammer) is on the story path. Cross the walkways and bridges to the save point.
- Forest Path: a Megalixir at the east dead end; Tellus is past the save point.
- Wandering Lands: on the second screen the first east dead end has the Silver Key, then take the left path; an Elixir sits by the save point before the last fight.
Weak to Ice.
Weak to Water.
Weak to Lightning.
Weak to Wind.
Weak to Light. Ends the chapter.
Don't miss
- Visions: Charlotte (Grandport Harbour: ask around Grandshelt Castle three times, check the Kolobos Ruins, find 'Mother' in the Cavern of Swords (north-east of Siren's Tower), then meet Charlotte in Grandshelt); Ayaka (Town of Sian (Pharm): visit the ley lines at Waterfall Way, the Infernal Hollow in Zoldaad's volcano and Mt. Thunderclap, then return to Ayaka. Her healing Resonance is the best for the Resonance farm)
- Espers: Bahamut (from the airship, once you have the other eight; level 50, no weakness, lots of ailments).
- Cave Masters: Necromonarch (Gronoa, south-east of the Town of Duggle, Lv 55, weak to Fire, Light); Humbaba (North-east Gronoa, just east of the Bladerain Stele, Lv 55, weak to Wind)
- Substories open by now: The Twin Titleholders (Lasswell, Gaberada, the Undertown (Gronoa))
- Sub quests: The Shield of the Weak (Charlotte), The Admirable Apprentice (Ayaka), The Twin Titleholders (Lasswell).
- Necromonarch and Humbaba caves (level 55) in Gronoa.
- Around Mt. Reizan you can reach 89 Tablet Shards: the last Adamantite.
- Trophies this chapter: Past Glory, The Sovereigns of the Planet
Tablet Shards in Chapter 7 (8)
| # | Area | Spot |
|---|---|---|
| 88 | Town of Sian | East past the item shop, under a blossom tree. |
| 89 | Mt. Reizan | From the first save point, at the ramp crossroads (one up, one down), take the path down. |
| 90 | Mt. Reizan | Further along the story path, by two pine trees on a platform between two wooden bridges. |
| 91 | Lake Ryusei | West side, under a tree. |
| 92 | Forest Path | North of the first save point, on a bend in the story path. |
| 93 | Forest Path | South-west of the second save point, at a dead end. |
| 94 | Wandering Lands | On the story path, after the left turn at the first fork past the save point. |
| 95 | Wandering Lands | Further along the story path, right beside you among stones after a cutscene. |
Chapter 8: Beyond Hope
The Crystal Tower: mostly a straight line, with gear and Tablet Shards on the side paths. Prepare before the last teleporter.
The route
- Take the Enterprise to the Crystal Tower; an event fight with Dante at the first portal.
- At the staircase go left for Laevateinn and a Megalixir, then take the right staircase (a hidden upper passage leads to the optional Pearly Pot).
- The Ancient Katana is at the save point; exit west for the story.
- Invisible bridges (they appear as you walk up): from the 3rd platform go east for the Book of Eibon; at the next fork west for a Tablet Shard; back on the main path east for the Hastur Long Barrel; on the next bridge go North, West, South for the Dragon Whisker; the east exit leads to the last save point with the Faerie Bow and a Magicite Cryst.
- Warning: the final teleporter is the point of no return. Save, heal and equip your best gear first.
Weak to Light or Wind. Wait for your allies' support attacks to make it vulnerable, then hit it.
Weak to Dark.
Phase 1 is weak to Light: build stagger and spend Resonances. Phase 2 has several targetable parts: check each weakness and keep a healer up while you clear the dangerous ones.
Don't miss
- Substories open by now: A New Leaf (Rain, on the airship deck)
- Merchant Traders now sell the Ancient Cloak (40,000 gil) and Ancient Tome (45,000 gil).
- After the credits, load your clear save: everything stays open, and Ultima Weapon appears in Ardra Crater.
- Trophies this chapter: Aspiration's End
Tablet Shards in Chapter 8 (4)
| # | Area | Spot |
|---|---|---|
| 96 | Crystal Tower | Following the main path from the entrance, take the right at the first fork. |
| 97 | Crystal Tower | After that, left at the next fork, then the next right. |
| 98 | Crystal Tower | Where see-through bridges appear as you approach: from the third solid platform go straight north, then west along the bridge. |
| 99 | Dragon's Maw | Near the end of the dungeon, where you fight the Rogue Magitek Armour (Pharm's southern tip, recommended level 55; open from Chapter 5). |
More Final Fantasy Resonance guides
Review & Platinum Roadmap
Our review, the roadmap and all 40 trophies on one page.
Story, Party & Substories
All 8 chapters, every party member, all 8 character substories, the chocobo and the airship.
Visions, Espers & Combat
All 26 Visions and all 9 Espers with locations, Mastery Ranks, awakening, and the 1,000-stagger and 400-Resonance grinds.
Legendary Arms, Adamantite & Tablet Shards
All 12 Legendary Arms and their trials, all 8 Adamantite for Aileen's weapons, the Oblivion Palace shard rewards and both gil trophies.
Cave Masters, Colosseum & Ultima Weapon
All 15 Cave Masters with levels and weaknesses, the three Colosseum leagues, the rare-enemy island, Mechabo's upgrades and how to beat Ultima Weapon.