← All guides Just DroppedSurvivalAction RPGCo-opPS5
Enshrouded
Keen Games' survival action RPG leaves early access and lands on PS5 with its 1.0 release: seven regions, a level cap of 50 and a final showdown with Lord Vorgoth. Our review, the platinum roadmap and all 59 trophies explained in depth.
The Review
Worth every hour in the fog
You wake as one of the Flameborn in Embervale, a kingdom swallowed by the Shroud, a corrupting fog that kills you if you stay in it too long. From a single Flame Altar you rebuild: rescue craftspeople, grow the Flame to push the fog back, and head out into seven regions, from the green Springlands to the snowbound Albaneve Summits and the brand-new Cinder's Cradle. Alone or with up to 16 friends.
What makes it special is that everything is built from voxels. You can dig through any mountain, carve a tunnel straight down to a buried Shroud Root, and build a castle stone by stone. The world is handcrafted rather than random, packed with ruined cities, towers and dungeons to climb, and gliding off an Ancient Spire into a valley you haven't seen yet never gets old. The skill tree lets you mix warrior, mage and ranger freely, and combat has real weight against the big Fell bosses.
After almost three years in early access, 1.0 feels complete: a proper ending with Lord Vorgoth, a level cap of 50 and a fully revised skill tree. It's still a survival game, so expect plenty of gathering, and the inventory management can wear thin. Critics have been glowing, with an 89 on Metacritic at launch, and at $39.99 on PS5 it's a huge amount of game. For trophy hunters it's a relaxed 3/10 platinum: no missables, no online, and world settings that never block trophies.
Platinum Roadmap
The road to Flame Reborn
One playthrough, 50–100 hours depending on your world settings, no missables and no online trophies.
1Set the world up first. Raise Combat, Mining, Quest and Exploration XP to 200% in the world settings: it doesn't affect trophies. The tutorial quests give you the altar, axe, pickaxe, skill point, glider and grappling hook trophies in the first couple of hours. See the levelling guide. 2Follow the main quests to rescue the craftspeople and upgrade the Flame. Each Flame level pushes back the red mist into the next region.
3Clear each region before you leave it: climb its Ancient Spire, read the Obelisks, then clear every Shroud Root and Elixir Well, touch every Flame Shrine and mine one of each valuable ore. Every location is on our region completion page. 4Revelwood: beat the Shroud Wyvern in Pikemead's Reach and collect all five Guard of the North pieces in the same visit. Kindlewastes: grab the Ghost Glider from the South-east Sun Temple straight away. Both are on the boss & gear page. 5Albaneve: light the 8 Balefires and kill the Dragon on Howling Peak. Veilwater, then Cinder's Cradle: clear the six sanctuaries (two hold roots, and they also lead to sealed roots in older regions), then climb to Lord Vorgoth.
6Clean up. Check every region's map for roots without a tick and shrines you didn't mark, and finish off level 50. That's the platinum.
Trophy Guides
In-depth guides
All 59 trophies explained in depth with the real trophy art, plus every region's spires, obelisks, roots and shrines, every boss and the fastest route to level 50.
Every Trophy
All 59 trophies — explained in depth
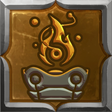
Flame Reborn (Platinum)
Details
Earn every other trophy. It's one long playthrough with nothing missable and no online trophies: follow the main quests to raise the Flame, and clear each region (spire, obelisks, roots, shrines and ores) before you move on. World settings and difficulty never block trophies, so turn the XP sliders up and the platinum takes about 50 hours instead of 100. Tip: Keep a custom map marker on every Flame Shrine you visit: the game doesn't tick them off, and the Spark trophies are the ones people end up hunting for.
Region Completion Guide 34 trophies
Thirty-four trophies (more than half the list) come from finishing the seven regions. Each region asks the same five things: climb its Ancient Spire, read its Obelisks, clear its Shroud Roots, find its Flame Shrines and Sanctums, and mine its valuable ores. Cinder's Cradle has no shrine trophy. This page shows how the game itself reveals every one of them, region by region.
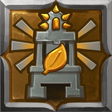
Springlands stargazer
Details
Bronze — Scaled an ancient spire in the Springlands. Reach the top of the Springlands Ancient Spire.
Ancient Spire – Springlands (the main one) and
Ancient Spire – Low Meadows in the south. Climb both: the trophy is tied to the main spire, and Low Meadows is a fast-travel point you'll want anyway. Each spire is a climbing puzzle of locked doors, switches and traps; at the top,
talk to the Flame. That unlocks the spire as a fast-travel point and marks the region's Obelisks on your map, which is how every other Springlands trophy starts.
Tip: Your first spire: the Blacksmith's quest
The Ancient Spires sends you there right after your first Elixir Well.
Full guide → 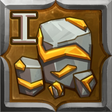
Mole of the Springlands
Details
Bronze — Mine every valuable material in the Springlands. Mine every valuable material in Springlands:
Flintstone,
Salt. Pull at least one of each straight out of a deposit with your pickaxe. Sources disagree on whether ore from chests or enemies counts, so mining it yourself is the safe way. Ordinary stone, dirt and plants don't count.
Tip: You need these ores for the region's Flame upgrade anyway, so it usually pops on its own.
Full guide → 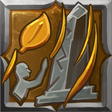
Springlands secret keeper
Details
Bronze — Read all obelisks in the Springlands. Read every Ancient Obelisk in Springlands. 2:
The Flame Touched Face and
In a World Destined for Ruin. The spire marks them on your map. Reading one reveals the region's
Shroud Roots (the Obelisks of Rot) or its
Flame Shrines and Sanctums (the Obelisks of Fire), so do them before you go hunting.
Tip: Can't be missed, and it pays for itself: after the Obelisks you never need an outside map for this region.
Full guide → 
Springland weeding
Details
Bronze — Clear the Springlands of all shroud roots. Destroy every Shroud Root in Springlands:
9 roots and all
3 Elixir Wells (West of Ferndale, East of Woodgard, East of Braelyn Bridge), so
12 targets in all by the game's own count. Roots sit deep in the Shroud or at the bottom of wells; hit them with your
axe, which is much faster than a weapon. A cleared root gets a small tick on its purple map icon, so it's easy to see what's left. If you can't find a way in, stand above the icon and dig straight down.
Tip: The three roots added in 1.0 sit on the region's outer edges, so check the corners of the map, not just the Shroud pockets you walked through.
Full guide → 
Spark of the Springlands
Details
Bronze — Find all flame shrines and sanctums in the Springlands. Visit every Flame Shrine and Sanctum in Springlands:
13 in total, all revealed by the region's Obelisks. You only need to reach each one. The game
doesn't mark shrines you've already visited, so drop a custom map marker on each as you go. Flame Altars you build yourself don't count.
Tip: Do the four southern shrines around level 3 and the four northern ones (Westcott, Ferndale, Mistbury Catacombs) from about level 7.
Full guide → 
Revelwoods stargazer
Details
Bronze — Scaled the ancient spire in the Revelwoods. Reach the top of the Revelwood Ancient Spire.
Ancient Spire – Revelwood Each spire is a climbing puzzle of locked doors, switches and traps; at the top,
talk to the Flame. That unlocks the spire as a fast-travel point and marks the region's Obelisks on your map, which is how every other Revelwood trophy starts.
Tip: Make the spire your first stop in the region: everything else follows from it.
Full guide → 
Mole of the Revelwoods
Details
Bronze — Mine every valuable material in the Revelwoods. Mine every valuable material in Revelwood:
Copper Ore,
Amber. Pull at least one of each straight out of a deposit with your pickaxe. Sources disagree on whether ore from chests or enemies counts, so mining it yourself is the safe way. Ordinary stone, dirt and plants don't count.
Tip: You need these ores for the region's Flame upgrade anyway, so it usually pops on its own.
Full guide → 
Revelwoods secret keeper
Details
Bronze — Read all obelisks in the Revelwoods. Read every Ancient Obelisk in Revelwood. 2:
Chasms Which Split the Earth and
Our Sanctum Amidst the Hollow, Blinded from Within. The spire marks them on your map. Reading one reveals the region's
Shroud Roots (the Obelisks of Rot) or its
Flame Shrines and Sanctums (the Obelisks of Fire), so do them before you go hunting.
Tip: Can't be missed, and it pays for itself: after the Obelisks you never need an outside map for this region.
Full guide → 
Revelwood weeding
Details
Bronze — Clear the Revelwood of all shroud roots. Destroy every Shroud Root in Revelwood:
7 roots and all
3 Elixir Wells (East of Lone Thistle, West of Pikemead's Reach, East of Fort Kelvin), so
10 targets in all by the game's own count. Roots sit deep in the Shroud or at the bottom of wells; hit them with your
axe, which is much faster than a weapon. A cleared root gets a small tick on its purple map icon, so it's easy to see what's left. If you can't find a way in, stand above the icon and dig straight down.
Tip: Two of the roots are inside Pikemead's Reach (Huckster Square and the Imperial Gardens): clear them on the same trip as the Wyvern.
Full guide → 
Spark of the Revelwoods
Details
Bronze — Find all flame shrines and sanctums in the Revelwoods. Visit every Flame Shrine and Sanctum in Revelwood:
13 in total, all revealed by the region's Obelisks. You only need to reach each one. The game
doesn't mark shrines you've already visited, so drop a custom map marker on each as you go. Flame Altars you build yourself don't count.
Tip: Three of them are inside Pikemead's Reach (south of the city, the Imperial Gardens and the Shanty Shacks).
Full guide → 
Nomad Highlands stargazer
Details
Bronze — Scaled the ancient spire in the Nomad Highlands. Reach the top of the Nomad Highlands Ancient Spire.
Ancient Spire – Nomad Highlands Each spire is a climbing puzzle of locked doors, switches and traps; at the top,
talk to the Flame. That unlocks the spire as a fast-travel point and marks the region's Obelisks on your map, which is how every other Nomad Highlands trophy starts.
Tip: Make the spire your first stop in the region: everything else follows from it.
Full guide → 
Mole of the Nomad Highlands
Details
Bronze — Mine every valuable material in the Nomad Highlands. Mine every valuable material in Nomad Highlands:
Tin Ore,
Fossilized Bone. Pull at least one of each straight out of a deposit with your pickaxe. Sources disagree on whether ore from chests or enemies counts, so mining it yourself is the safe way. Ordinary stone, dirt and plants don't count.
Tip: You need these ores for the region's Flame upgrade anyway, so it usually pops on its own.
Full guide → 
Nomad Highlands secret keeper
Details
Bronze — Read all obelisks in the Nomad Highlands. Read every Ancient Obelisk in Nomad Highlands. 2:
Our Eye Towards the Stars, Forever Shut and
A Breath of Life, Fading. The spire marks them on your map. Reading one reveals the region's
Shroud Roots (the Obelisks of Rot) or its
Flame Shrines and Sanctums (the Obelisks of Fire), so do them before you go hunting.
Tip: Can't be missed, and it pays for itself: after the Obelisks you never need an outside map for this region.
Full guide → 
Nomad Highlands weeding
Details
Bronze — Clear the Nomad Highlands of all shroud roots. Destroy every Shroud Root in Nomad Highlands:
7 roots and all
3 Elixir Wells (West of Rattlebleak, South of the Pillars of Creation, Umber Hollow), so
10 targets in all by the game's own count. Roots sit deep in the Shroud or at the bottom of wells; hit them with your
axe, which is much faster than a weapon. A cleared root gets a small tick on its purple map icon, so it's easy to see what's left. If you can't find a way in, stand above the icon and dig straight down.
Tip: One well's root is about 200 m south-west of its map icon, past a Fell Monstrosity: follow the Shroud road to the grappling section.
Full guide → 
Spark of the Nomad Highlands
Details
Bronze — Find all flame shrines and sanctums in the Nomad Highlands. Visit every Flame Shrine and Sanctum in Nomad Highlands:
13 in total, all revealed by the region's Obelisks. You only need to reach each one. The game
doesn't mark shrines you've already visited, so drop a custom map marker on each as you go. Flame Altars you build yourself don't count.
Tip: Shrines also give Sparks for the Flame upgrades, so you lose nothing by doing them early.
Full guide → 
Kindlewastes stargazer
Details
Bronze — Scaled the ancient spire in the Kindlewastes. Reach the top of the Kindlewastes Ancient Spire.
Ancient Spire – Kindlewastes Each spire is a climbing puzzle of locked doors, switches and traps; at the top,
talk to the Flame. That unlocks the spire as a fast-travel point and marks the region's Obelisks on your map, which is how every other Kindlewastes trophy starts.
Tip: Make the spire your first stop in the region: everything else follows from it.
Full guide → 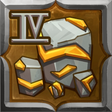
Mole of the Kindlewastes
Details
Bronze — Mine every valuable material in the Kindlewastes. Mine every valuable material in Kindlewastes:
Iron Ore,
Sulfur,
Lapis Lazuli. Pull at least one of each straight out of a deposit with your pickaxe. Sources disagree on whether ore from chests or enemies counts, so mining it yourself is the safe way. Ordinary stone, dirt and plants don't count.
Tip: You need these ores for the region's Flame upgrade anyway, so it usually pops on its own.
Full guide → 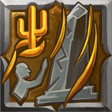
Kindlewastes secret keeper
Details
Bronze — Read all obelisks in the Kindlewastes. Read every Ancient Obelisk in Kindlewastes. 2:
As the Final Tide Frees Us and
Of the Flaw in Us All (one is near the Alchemist's scientific-instruments quest). The spire marks them on your map. Reading one reveals the region's
Shroud Roots (the Obelisks of Rot) or its
Flame Shrines and Sanctums (the Obelisks of Fire), so do them before you go hunting.
Tip: Can't be missed, and it pays for itself: after the Obelisks you never need an outside map for this region.
Full guide → 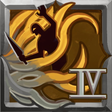
Kindlewastes weeding
Details
Bronze — Clear the Kindlewastes of all shroud roots. Destroy every Shroud Root in Kindlewastes:
8 roots and all
4 Elixir Wells (South of Brittlebush, West of Sapphire Strand, East of Rose Shell Burrow, North of Low Tide), so
12 targets in all by the game's own count. Roots sit deep in the Shroud or at the bottom of wells; hit them with your
axe, which is much faster than a weapon. A cleared root gets a small tick on its purple map icon, so it's easy to see what's left. If you can't find a way in, stand above the icon and dig straight down.
Tip: Two roots were added in 1.0 on the desert's edges; the Obelisks reveal them.
Full guide → 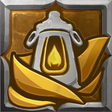
Spark of the Kindlewastes
Details
Bronze — Find all flame shrines and sanctums in the Kindlewastes. Visit every Flame Shrine and Sanctum in Kindlewastes:
13 in total, all revealed by the region's Obelisks. You only need to reach each one. The game
doesn't mark shrines you've already visited, so drop a custom map marker on each as you go. Flame Altars you build yourself don't count.
Tip: The five Sun Temples count: each registers when its name appears on screen. The
Haunted Sun Temple only counts once you've squeezed in far enough to reveal its real entrance on the map.
Full guide → 
Albaneve Summits stargazer
Details
Bronze — Scaled the ancient spire in the Albaneve Summits. Reach the top of the Albaneve Summits Ancient Spire.
Ancient Spire – Albaneve Summits Each spire is a climbing puzzle of locked doors, switches and traps; at the top,
talk to the Flame. That unlocks the spire as a fast-travel point and marks the region's Obelisks on your map, which is how every other Albaneve Summits trophy starts.
Tip: Build an altar near the top afterwards: Albaneve's peaks are slow to cross on foot.
Full guide → 
Mole of the Albaneve Summits
Details
Bronze — Mine every valuable material in the Albaneve Summits. Mine every valuable material in Albaneve Summits:
Silver Ore,
Amethyst,
Obsidian, and
Coal to be safe (one PS5 finisher lists it too). Pull at least one of each straight out of a deposit with your pickaxe. Sources disagree on whether ore from chests or enemies counts, so mining it yourself is the safe way. Ordinary stone, dirt and plants don't count.
Tip: You need these ores for the region's Flame upgrade anyway, so it usually pops on its own.
Full guide → 
Albaneve Summits secret keeper
Details
Bronze — Read all obelisks in the Albaneve Summits. Read every Ancient Obelisk in Albaneve Summits. 2:
In These Windswept Summits (among the high peaks) and
We Won't Share Our Breath With You (far to the north-east, outside the Shroud). The spire marks them on your map. Reading one reveals the region's
Shroud Roots (the Obelisks of Rot) or its
Flame Shrines and Sanctums (the Obelisks of Fire), so do them before you go hunting.
Tip: Can't be missed, and it pays for itself: after the Obelisks you never need an outside map for this region.
Full guide → 
Albaneve Summits weeding
Details
Bronze — Clear the Albaneve Summits of all shroud roots. Destroy every Shroud Root in Albaneve Summits:
11 roots and every
Elixir Well on your map (the 1.0 files count 2; the wiki names three: South-east of the Elixir Production Site, West of the Forge of Obsidia, East of Polaris Falls), so
13 targets in all by the game's own count. Roots sit deep in the Shroud or at the bottom of wells; hit them with your
axe, which is much faster than a weapon. A cleared root gets a small tick on its purple map icon, so it's easy to see what's left. If you can't find a way in, stand above the icon and dig straight down.
Tip: One Elixir Well holds three roots on one route (updrafts across a chasm, a second crossing, then a Fell Cyclops at the top).
Full guide → 
Spark of the Albaneve Summits
Details
Bronze — Find all flame shrines and sanctums in the Albaneve Summits. Visit every Flame Shrine and Sanctum in Albaneve Summits:
8 in total, all revealed by the region's Obelisks. You only need to reach each one. The game
doesn't mark shrines you've already visited, so drop a custom map marker on each as you go. Flame Altars you build yourself don't count.
Tip: Shrines also give Sparks for the Flame upgrades, so you lose nothing by doing them early.
Full guide → 
Veilwater Basin stargazer
Details
Bronze — Scaled the ancient spire in the Veilwater Basin. Reach the top of the Veilwater Basin Ancient Spire.
Ancient Spire – Veilwater Basin (part of the climb drops you into dark water past spike traps; there's air to refill near a button on the lower level) Each spire is a climbing puzzle of locked doors, switches and traps; at the top,
talk to the Flame. That unlocks the spire as a fast-travel point and marks the region's Obelisks on your map, which is how every other Veilwater Basin trophy starts.
Tip: Part of this climb drops you into dark water around spike traps; refill your air near the button on the lower level.
Full guide → 
Mole of the Veilwater Basin
Details
Bronze — Mine every valuable material in the Veilwater Basin. Mine every valuable material in Veilwater Basin:
Gold Ore,
Aquamarine,
Mother-of-Pearl. Pull at least one of each straight out of a deposit with your pickaxe. Sources disagree on whether ore from chests or enemies counts, so mining it yourself is the safe way. Ordinary stone, dirt and plants don't count.
Tip: You need these ores for the region's Flame upgrade anyway, so it usually pops on its own.
Full guide → 
Veilwater Basin secret keeper
Details
Bronze — Read all obelisks in the Veilwater Basin. Read every Ancient Obelisk in Veilwater Basin. 2:
Old Wounds Reopen (north-east of the spire) and
Ones We Carved Ourselves (underwater, at the bottom of the north-western lagoon). The spire marks them on your map. Reading one reveals the region's
Shroud Roots (the Obelisks of Rot) or its
Flame Shrines and Sanctums (the Obelisks of Fire), so do them before you go hunting.
Tip: Can't be missed, and it pays for itself: after the Obelisks you never need an outside map for this region.
Full guide → 
Veilwater Basin weeding
Details
Bronze — Clear the Veilwater Basin of all shroud roots. Destroy every Shroud Root in Veilwater Basin:
6 roots and all
3 Elixir Wells (East of Orville, North-west of Goldrock Saddle, South of Mining Rift), so
9 targets in all by the game's own count. Roots sit deep in the Shroud or at the bottom of wells; hit them with your
axe, which is much faster than a weapon. A cleared root gets a small tick on its purple map icon, so it's easy to see what's left. If you can't find a way in, stand above the icon and dig straight down.
Tip: The one people miss is east of the Cromville Throneroom: go past the throne room and down below it.
Full guide → 
Spark of the Veilwater Basin
Details
Bronze — Find all flame shrines and sanctums in the Veilwater Basin. Visit every Flame Shrine and Sanctum in Veilwater Basin:
8 in total, all revealed by the region's Obelisks. You only need to reach each one. The game
doesn't mark shrines you've already visited, so drop a custom map marker on each as you go. Flame Altars you build yourself don't count.
Tip: Shrines also give Sparks for the Flame upgrades, so you lose nothing by doing them early.
Full guide → 
Cinder's Cradle stargazer
Details
Bronze — Scaled the ancient spire in the Cinder's Cradle Reach the top of the Cinder's Cradle Ancient Spire. Two spires:
Sky Islands and
Citadel. Climb both; they're your fast-travel points for the final region. Each spire is a climbing puzzle of locked doors, switches and traps; at the top,
talk to the Flame. That unlocks the spire as a fast-travel point and marks the region's Obelisks on your map, which is how every other Cinder's Cradle trophy starts.
Tip: Climb both spires: each is a fast-travel point you'll use constantly in the last region.
Full guide → 
Mole of the Cinder's Cradle
Details
Bronze — Mine every valuable material in the Cinder's Cradle. Mine every valuable material in Cinder's Cradle:
Celestium,
Basalt,
Diamond,
Moonstone (Moonstone mostly drops from the region's enemies). Pull at least one of each straight out of a deposit with your pickaxe. Sources disagree on whether ore from chests or enemies counts, so mining it yourself is the safe way. Ordinary stone, dirt and plants don't count.
Tip: You need these ores for the region's Flame upgrade anyway, so it usually pops on its own.
Full guide → 
Cinder's Cradle secret keeper
Details
Bronze — Read all obelisks in the Cinder's Cradle. Read every Ancient Obelisk in Cinder's Cradle. Read every Obelisk the spires reveal (the 1.0 region is too new for a full public list). The spire marks them on your map. Reading one reveals the region's
Shroud Roots (the Obelisks of Rot) or its
Flame Shrines and Sanctums (the Obelisks of Fire), so do them before you go hunting.
Tip: Can't be missed, and it pays for itself: after the Obelisks you never need an outside map for this region.
Full guide → 
Cinder's Cradle Weeding
Details
Bronze — Clear the Cinder's Cradle of all shroud roots. Destroy every Shroud Root in Cinder's Cradle:
9 roots (there are no Elixir Wells here), so
9 targets in all by the game's own count. Roots sit deep in the Shroud or at the bottom of wells; hit them with your
axe, which is much faster than a weapon. A cleared root gets a small tick on its purple map icon, so it's easy to see what's left. If you can't find a way in, stand above the icon and dig straight down.
Tip: Two roots are inside two of the six sanctuaries. Lighting the Beacons doesn't clear them, so check the map before the Floating Isles.
Full guide → Bosses & Special Gear 7 trophies
Seven trophies come from the story's big moments: the four boss kills, your first Elixir Well, the Guard of the North armour set in Revelwood and the Ghost Glider in the Kindlewastes. None of them can be missed.

Thundering success
Details
Silver — Defeat the guardian of the first elixir well. Kill the
Fell Thunderbrute, the mini-boss guarding the Shroud Root at the bottom of your
first Elixir Well in the Springlands. The main quests send you there early. It's slow and telegraphs everything, but each hit lands hard: stay at its side or back, dodge sideways when it raises its arms, and punish after each slam. Destroying the root alone doesn't count; the brute itself has to die.
Tip: Silver. If you sneak past it and only destroy the root, come back: the well stays open and you can fight it later.
Full guide → 
Well done!
Details
Bronze — Cleared the first elixir well. Clear your first
Elixir Well by destroying the Shroud Root at its bottom; for most players that's the well
north of Longkeep that the main quest sends you to. Wells are deep Shroud dungeons marked on the map; each one cleared gives
3 skill points (an ordinary root gives 1). Use your
axe on roots, it's much faster than a weapon.
Tip: Pops together with, or just after, Thundering success. Every well root also counts towards its region's weeding trophy.
Full guide → 
Pieces of the past
Details
Bronze — Find all forgotten "guard of the north" armor pieces. Collect all
5 Guard of the North armour pieces in
Pikemead's Reach. You don't need to wear them.
Gloves: beat the Fell Brute guarding the Shroud Root on the
west side of the city; the gold chest is by the portcullis (reach it over the rooftops and through the hole in the wall of the big inn). The note beside it marks the next piece with a "!" on your map, and each piece leads to the next.
Boots: top of the tower at the
south-east corner of the city wall.
Pants: a chest buried in rubble on the east side of the ruined building at the northern tip of
Pike's Port.
Chestplate: a glowing stone coffin in the
Imperial Garden crypt on the east side, which only opens once you've followed the journals.
Helmet: after the Wyvern, use the Key to the Pike, go through the Throne Room, up the broken tower and along the ramparts, then grapple to the eastern tower's balcony.
Tip: Double Jump makes the towers much easier. Four of the five pieces don't need the Wyvern; the helmet does.
Full guide → 
Dethroned
Details
Silver — Defeat the shroud wyvern. Kill the
Shroud Wyvern (the Fell Wispwyvern), the boss at the end of the
Revelwood questline in
Pikemead's Reach, the ruined capital in the north-east of Revelwood. Climb the ruined walls of the
Imperial Garden until you see a large walled square below, then drop in to start the fight. It's not a hard boss: stock up on healing, keep moving out of its dives and Shroud breath, and hit it when it lands. It drops the
Key to the Pike (which opens the way to the Guard of the North helmet) and the head you need for the next Flame upgrade.
Tip: Silver. Can't be missed: the Flame upgrade won't let you progress without it.
Full guide → 
Winged Victory
Details
Bronze — Obtain a ghost glider. Get the
Ghost Glider. It sits in a
gold chest at the very top of the South-east Sun Temple in the Kindlewastes, the goal of the Alchemist's quest
Among the Bluejays. You're meant to climb up through its puzzles, but it's much quicker to climb the big sand mountain behind it and glide onto one of the upper floors, using
Updraft to gain height. Looting it also unlocks the Ghost Glider recipe at the Carpenter (3 Shroud Wood, 2 Fabric, 4 Enshrouded Oil, 1 Sulfur, 1 String), so co-op partners can craft their own.
Tip: Get it as soon as you reach the desert: it's the best glider in the game and makes the last four regions far quicker.
Full guide → 
King of the mountain
Details
Gold — Defeat the dragon. Kill the
Dragon (the Fell Dragon Youngling) on
Howling Peak, the highest point in Embervale, in the
Albaneve Summits. The quest
Slaying the Corrupted Beast (recommended level 34) asks you to light
8 Balefires around the region, the last one at
Everfrore Keep (they shoot huge
red beams into the sky, so they're easy to spot); once all eight are lit, the arena on the summit opens. It throws falling fireballs, sweeps fire breath across the arena and knocks you off the platform with its wings. You can
parry the falling fireballs back to stun it, and the dragon was toned down in 1.0. The reliable method is ranged:
stun (paralysing) arrows to drop it out of the air, then melee it while it's grounded. Bring plenty of
Obsidian arrows, or the mana-powered eternal arrows from the Hunter, and fight from a rocky point at the edge of the arena so its melee can't reach you.
Tip: Gold. Place a Flame Altar on Howling Peak first: it's a spawn point next to the arena and saves you the long climb after every death.
Full guide → 
A new North Star
Details
Gold — Defeat Lord Vorgoth. Defeat
Lord Vorgoth, the final boss, at the top of
Cinder's Cradle. The main quest has you clear the region's
6 sanctuaries (the Beacon dungeons), which opens the
Floating Isles; fight your way up to him from there. He's a level-50 fight in
two phases: a humanoid knight (you can backstab him in this form) and then a Shroud monstrosity (you can't). He takes
120% damage from Fire and
none from Shroud, so swap any Shroud weapons out. The organs that grow around the arena pass the damage you deal to them on to Vorgoth and share his fire weakness. In co-op each extra player adds 70% to his health.
Tip: Gold. Most players find him easier than the flying boss right before him. Fire weapons (Pyreblade, Arsonist's Bow) make it quick.
Full guide → Levels, Skills & First Steps 17 trophies
Seventeen trophies: the six that pop in your first hour or two, and eleven level milestones from level 2 to the cap of 50. The world settings make the grind as short as you want, and none of them block trophies.
Doing something right
Details
Bronze — Reach level 2. Reach
level 2. It comes from your first kills and crafts in the starting area, just after you climb out of the tomb. Every level from here to 50 gives
2 skill points, so this is also usually when you unlock your first skill (Erudite).
Tip: Can't be missed. This is the moment to set the XP world settings to 200% if you want the shorter platinum.
Full guide → 
Thus it begins
Details
Bronze — Craft a simple item. Craft your first item. The opening quests ask for a
pickaxe and an
axe, both made straight from your inventory: you need
Stones (pick them up off the ground),
Plant Fibre and
Twigs (gathered together from bushes) and
String, which you craft from Plant Fibre in the same menu. Better axes and pickaxes come from the Blacksmith once you rescue him.
Tip: Can't be missed. It pops in your first few minutes.
Full guide → 
A place to call home
Details
Bronze — Create a flame altar. Build a
Flame Altar. It's one of the first quest steps after you leave the starting tomb: collect
5 Stones, craft the altar from your inventory and place it to found your base. The altar is the heart of the game: upgrading the Flame later is what pushes back the red-mist barriers and lets you into new regions.
Tip: Can't be missed. Only an altar you build counts here; the ones you find in the world are for the Spark trophies.
Full guide → 
Leave a mark
Details
Bronze — Mine terrain for the first time. Dig into the ground or a rock face with your pickaxe for the first time. Everything in Embervale is made of voxels, so any swing at stone or soil counts. You'll be doing a lot of this: when a Shroud Root or shrine has no obvious way in, stand above it on the map and
dig straight down.
Tip: Can't be missed. It usually pops while you're mining your first Flintstone or Salt.
Full guide → 
Erudite
Details
Bronze — Unlock your first skill. Spend your first skill point. You get one every level, plus extra points for every Shroud Root and Elixir Well you clear, so you'll have one within minutes. Good first picks are the movement skills:
Double Jump and the glider
Updraft (rise while gliding) make every region trophy faster.
Tip: Can't be missed. You can't lock yourself out of a build: skills can be reset at a Flame Altar later.
Full guide → 
Shortcut
Details
Bronze — Craft or obtain a grappling hook. Craft or obtain a
Grappling Hook. Build it at the
Workbench once the Blacksmith is at your base:
4 Metal Scraps (from enemies and from smashing metal crates and barrels with the pickaxe),
7 String and
10 Shroud Spores (dropped by creatures inside the Shroud). The Blacksmith's own "Grappling Hook" quest (around level 3) walks you through it.
Tip: Can't be missed. Grapple points are everywhere, and many shrines and roots can't be reached without one.
Full guide → 
Freefall
Details
Bronze — Craft or obtain a glider. Craft or obtain a
Glider. Also a Workbench recipe:
8 Shroud Wood (chop dead trees inside the Shroud with your axe),
2 Animal Fur,
2 String and
2 Shroud Spores. The Blacksmith's "Glider" quest covers it around level 3.
Tip: Can't be missed. Craft it as early as possible: gliding from the Ancient Spires is the fastest way around every region.
Full guide → 
On the way
Details
Bronze — Reach level 5. Reach
level 5. The Springlands' opening quests (rescuing the Blacksmith, the axe and pickaxe, the Flame Altar), a few Vukah camps and your first Elixir Well with the
Fell Thunderbrute get you here. Around this point the Blacksmith's quests also hand you the glider and grappling hook.
Tip: Can't be missed. Mine every Flintstone and Salt deposit you pass: it's XP and it pops Mole of the Springlands.
Full guide → 
Things are coming together
Details
Bronze — Reach level 10. Reach
level 10, roughly the point where the Springlands are done and you're ready for
Revelwood (enemies there sit around level 11–15).
Tip: Can't be missed. If you're short, mine: mining gives surprisingly good XP early on.
Full guide → 
Getting a feel for it
Details
Bronze — Reach level 15. Reach
level 15, usually while finishing Revelwood. Pikemead's Reach is where most of it comes from: the Shroud Wyvern, its Elixir Well, two roots, three shrines and the five Guard of the North chests. Enemies in the
Nomad Highlands next door sit around level 16–20, so this is the right level to move on.
Tip: Can't be missed.
Full guide → 
How far we have come
Details
Bronze — Reach level 20. Reach
level 20, usually as you finish the Nomad Highlands: the spire, two Obelisks, 7 roots, 3 Elixir Wells and 13 shrines are a lot of XP. The next region, the
Kindlewastes desert, starts around level 21.
Tip: Can't be missed. Kill the Fell Monstrosity here early: its head is what the Flame 5 upgrade needs.
Full guide → 
Impressive journey
Details
Bronze — Reach level 25. Reach
level 25, mid-way through the Kindlewastes. The desert is the biggest of the early regions, with 4 Elixir Wells, 8 roots and five Sun Temples, so it's a level or two on its own. Grab the Ghost Glider from the South-east Sun Temple around now: the faster you move, the faster the XP comes.
Tip: Can't be missed.
Full guide → 
Climbing to new heights
Details
Bronze — Reach level 30. Reach
level 30, around your arrival in the snowy
Albaneve Summits (enemies around 28–35).
Tip: Can't be missed. Bring cold-resistant gear and food before you go up.
Full guide → 
Reaching the top
Details
Bronze — Reach level 35. Reach
level 35, the top of the Albaneve range and about where you want to be for the Dragon on Howling Peak. Albaneve has the most Shroud Roots of any region (11), and each one is a skill point as well as XP.
Tip: Can't be missed. Don't go west into Veilwater until you're past 35 and have Flame 8: the level gap there is the biggest in the game.
Full guide → 
Ready for new lands
Details
Bronze — Reach level 40. Reach
level 40. There's a big jump between Albaneve (top end 35) and the
Veilwater Basin (enemies around 37–45), so level past 35 before you head west.
Tip: Can't be missed. This is where the XP sliders start to matter.
Full guide → 
Onto new horizons
Details
Bronze — Reach level 45. Reach
level 45. Veilwater's enemies are the best XP before the finale; be close to level 46 before you push into
Cinder's Cradle (enemies 46–50).
Tip: Can't be missed.
Full guide → 
Above the clouds
Details
Bronze — Reach level 50. Reach the level cap of
50, new in 1.0. Turn the
Combat, Mining, Quest and Exploration XP world settings up to
200%; they don't affect trophies and cut the grind roughly in half. The quickest farm is mining: the
Flintstone deposit right next to the first base in the Springlands is good for a level or two every ten minutes, and deposits regrow after about
30 minutes away from the area or when you reload the game. Cinder's Cradle's quests and dense enemy packs are the other big XP source late on.
Tip: Can't be missed. You'll likely hit 50 naturally if you clear every region with the XP sliders up.
Full guide → FAQ
Enshrouded platinum — quick answers
How long does the Enshrouded platinum take?
About 50 hours if you turn the XP world settings up to 200% and focus on trophies, and closer to 100 hours playing at the default settings and taking your time.
Is the Enshrouded platinum hard?
No. We'd call it
3/10 with the world settings in your favour (4/10 without). Nothing is missable, there are no online trophies and only four bosses are required. The work is the region clean-up: every Shroud Root, Flame Shrine and Obelisk in seven regions. Our
region guide shows where they all are.
Do world settings or difficulty disable trophies in Enshrouded?
No. PS5 players who have finished the list confirm that the difficulty presets and all the world-setting sliders (XP rates, enemy damage, Shroud timer and the rest) never block trophies, and you can change them mid-game.
Are there missable trophies in Enshrouded?
No. It's an open world you can always go back to, every boss stays available and every region can be revisited at any time.
Can you get the trophies in co-op?
Yes, Enshrouded supports online co-op for up to 16 players, but no trophy needs it. Bosses scale up with more players (Lord Vorgoth gains 70% health per extra player), so solo is often just as quick.
How many Shroud Roots are there in Enshrouded?
In 1.0 there are
60 Shroud Roots and 18 Elixir Wells across Embervale. The weeding trophies need every root and every well in their region. Full per-region lists are on our
region completion page.
Where is the Ghost Glider?
In a gold chest at the very top of the
South-east Sun Temple in the Kindlewastes. Glide in from the sand mountain behind it to skip most of the climb. Details on our
boss & gear page.
 · 2
 · 2
 · 54
